


Is It Safe to Use a Jewelry Ultrasonic Cleaner for Your Retainer?
Browse Volume:215 Classify:Support
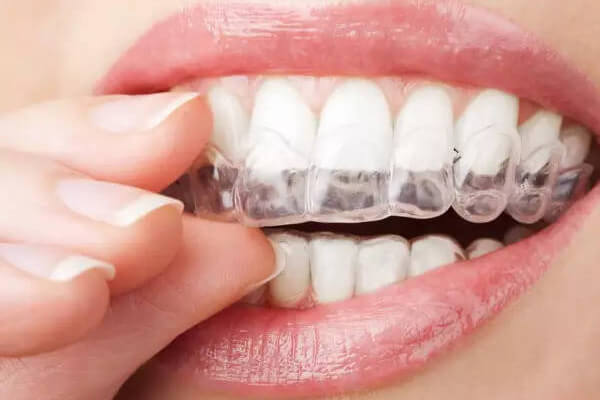
When you first hold a retainer in your hand—light, clear, and often a bit grimy by the end of the day—it feels like something delicate enough to demand special care, yet durable enough to withstand regular cleaning. That balance between fragility and strength is what makes people wonder: can I just pop it into the ultrasonic cleaner I use for jewelry?
It’s a logical question. Ultrasonic jewelry cleaners are known for their ability to gently lift off stubborn grime using tiny, high-frequency vibrations. Earrings, necklaces, even rings with intricate settings come out gleaming. But retainers? They’re not made of metal and gemstones. Instead, they consist of polymers, sometimes wires, and always the imprint of your unique dental alignment. Are they compatible with the cleaning power of ultrasonic waves?
Before deciding whether you should or shouldn’t, it helps to understand what happens inside an ultrasonic cleaner and what your retainer is truly made of. From there, it becomes easier to assess whether this match makes sense—or whether a toothbrush and retainer-safe tablets are a better route.
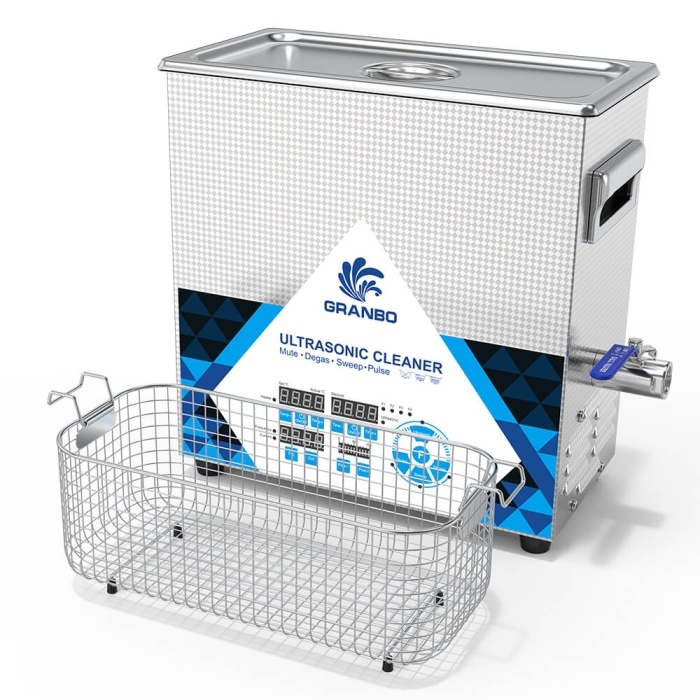
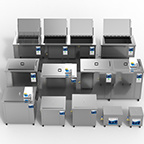
Granbo ultrasonic cleaners
What Really Happens Inside an Ultrasonic Cleaner?
It may sound like magic, but ultrasonic cleaning is a science rooted in physics—specifically in a phenomenon called cavitation. Imagine a tank of liquid (usually water mixed with some form of cleaning agent) being bombarded with high-frequency sound waves, typically in the range of 40,000 cycles per second (40 kHz). These waves create millions of microscopic bubbles that rapidly form and collapse. When they burst, they release tiny shockwaves that dislodge dirt, oils, and microscopic particles from the surfaces they come into contact with.
The result? A deep clean that goes far beyond what brushing or soaking alone can achieve. The key benefit is that ultrasonic waves reach into crevices, seams, and textured surfaces where grime tends to hide—without needing harsh scrubbing that could damage delicate materials.
That’s what makes ultrasonic cleaners so popular for jewelry, watches, and surgical instruments. But the very same forces that clean so thoroughly can also be too intense for certain materials—especially plastics or glued joints.
So what about retainers? That depends on what yours is made of.
The Materials That Make Up Your Retainer
Not all retainers are created equal. Some are made entirely of clear plastic, like Essix or Vivera retainers, which are similar to Invisalign trays. Others, like the Hawley retainer, feature a combination of acrylic and stainless-steel wires. Each of these materials reacts differently when exposed to ultrasonic energy.
Clear plastic retainers are generally more delicate. Prolonged exposure to ultrasonic vibrations, especially at higher frequencies or in heated solutions, may cause microfractures or cloudiness in the plastic. The heat and mechanical energy may also degrade the integrity of the material over time, leading to warping or loosening.
Hawley retainers, on the other hand, tend to be more durable. The acrylic base can handle moderate cleaning conditions, and the metal wires benefit from ultrasonic cleaning’s ability to remove plaque and debris that might accumulate in the bends or joints. Still, caution is necessary—especially if there are joints or adhesive spots where the wire is embedded into the acrylic.
Manufacturers often advise against ultrasonic cleaning for removable dental appliances unless the cleaner is specifically designed for that use case. That brings us to the next big question.
Is It Safe to Use a Jewelry Ultrasonic Cleaner for a Retainer?
At first glance, it might seem like a logical shortcut. If your ultrasonic cleaner works wonders on rings, necklaces, or eyeglasses, surely it should work just as well on a retainer, right? The truth is, not all ultrasonic cleaners are created equal, and neither are all cleaning targets. Jewelry cleaners are optimized for hard materials like metal and gemstone, while retainers involve softer plastics, adhesives, and biological buildup.
Let’s take a closer look at the potential risks and possible benefits.
The Potential Risks
Material degradation: Most jewelry ultrasonic cleaners run at a frequency of around 40 kHz and may come with built-in heating elements. While this is perfect for loosening grime on gold chains or diamond rings, it can be excessive for dental plastics. Repeated exposure may cause the surface of your retainer to become pitted or cloudy, ultimately compromising its fit or feel.
Warping and deformation: If the device heats the solution beyond body temperature—particularly above 50 degrees Celsius—it might deform the acrylic or plastic components of your retainer, especially if left submerged for more than a few minutes.
Bond failure: Hawley retainers use metal wires embedded in acrylic, and ultrasonic vibrations could potentially loosen these bonds over time. Though rare, such mechanical stress is something dental professionals keep in mind when recommending cleaning protocols.
Cross-contamination risk: If you use your cleaner for both jewelry and oral appliances, there’s a hygiene issue. Bacteria from your retainer could linger in the tank, especially if not properly cleaned between uses. This becomes a bigger concern if you use additives or detergents that are unsuitable for oral appliances.
When It Might Be OK
Now that we’ve covered the concerns, let’s be fair: in controlled conditions, some people do use ultrasonic cleaners for their retainers without adverse effects. The key lies in how you control those conditions.
- Use only water or dentist-approved cleaning solutions—never general-purpose jewelry cleaning fluids.
- Set short cleaning cycles—less than 3 minutes is usually more than enough.
- Avoid using heat, unless your device has very accurate temperature controls.
- Rinse and dry thoroughly to prevent any chemical residue from lingering.
Even so, it’s still recommended that you consult with your dentist or orthodontist before relying on ultrasonic cleaning as your go-to method. They know your retainer’s materials and condition better than anyone else.
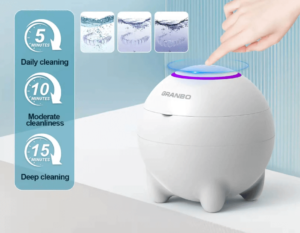
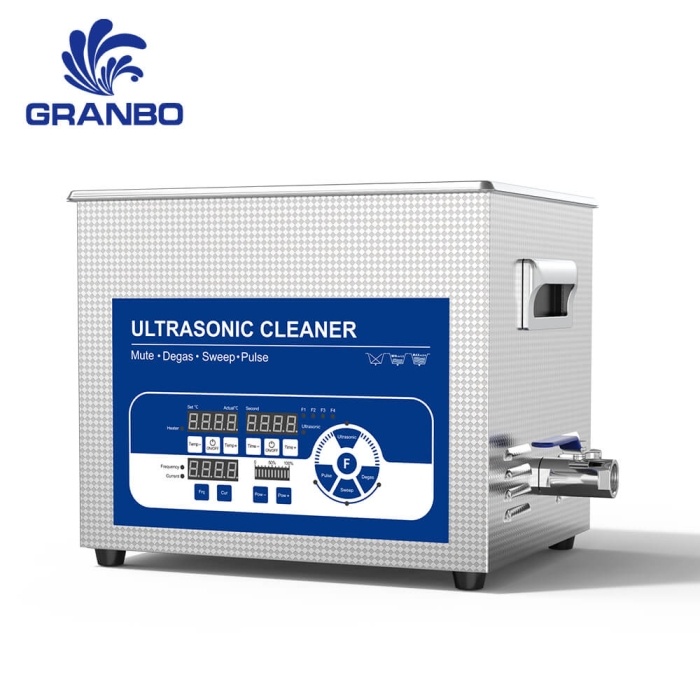
Granbo GC01 UV Ultrasonic Cleaner for Dentures and Retainers
Let’s now turn our attention to how ultrasonic cleaning compares with other retainer cleaning methods you might already be using—and whether upgrading to ultrasonic tech is worth it.
Ultrasonic Cleaning vs Traditional Retainer Cleaning Methods
It’s easy to fall into habit when it comes to oral hygiene. You might be brushing your retainer with a toothbrush and toothpaste every night, or perhaps soaking it in a fizzy tablet solution once a week. So how do these time-tested techniques stack up against ultrasonic cleaning?
Let’s take a moment to reflect on each method, not as opponents, but as tools—each with its own strengths.
Brushing with Toothpaste
This is the most common approach, especially for Hawley retainers and clear plastic ones like Essix. It’s simple and cheap. But it’s also risky.
Most commercial toothpastes contain abrasive particles designed for enamel, not acrylic or thermoplastics. Brushing your retainer with them can cause microscopic scratches on the surface. These scratches become perfect breeding grounds for bacteria and plaque. Even soft-bristle brushes can degrade a retainer over time if used daily.
Also, consider this: brushing cannot reach the tiny crevices between bonded wires or into the inner contours of a molded plastic tray. You may be cleaning what you see—but not what’s hiding underneath.
Soaking in Cleaning Tablets
Effervescent tablets like those made for dentures or aligners are a popular weekly ritual. Drop the retainer into a glass of water, toss in the tablet, watch it fizz for 15 minutes, then rinse.
This method is gentle and effective for killing bacteria and breaking down biofilm. But there are caveats. First, it doesn’t remove visible debris like food particles or tartar—unless paired with brushing. Second, overuse can discolor metal parts of the retainer or degrade elastic components.
And of course, tablets don’t agitate. They rely entirely on chemical reaction.
Ultrasonic Cleaning
Ultrasonic cleaners, in contrast, harness mechanical energy in the form of cavitation. That means they physically shake and lift dirt from every microscopic crevice, without relying solely on abrasives or chemicals. It’s like giving your retainer a spa day at a molecular level.
In studies comparing retainer cleaning efficacy, ultrasonic devices were shown to remove significantly more plaque and biofilm than brushing alone, and even outperformed tablet-based soaking when combined with appropriate solutions.
Still, that power must be managed responsibly. Heat, harsh chemicals, or long cycles can cause damage—just like overbrushing or using the wrong tablet. Ultrasonic cleaning is most effective when part of a broader hygiene routine.
Here’s a quick side-by-side comparison to visualize the difference:
| Method | Effectiveness | Surface Safety | Time Required | Depth of Cleaning | Reusability |
|---|---|---|---|---|---|
| Brushing + Toothpaste | Moderate | Low (scratching risk) | 2 minutes | Superficial | Daily |
| Cleaning Tablets | Good | Moderate (chemical wear) | 15 minutes | Moderate | Weekly |
| Ultrasonic Cleaner | Excellent | High (with care) | 3 to 5 minutes | Deep + thorough | Daily or Weekly |
What this table shows is not that one method is universally best—but that ultrasonic cleaning brings something new to the conversation: thoroughness, especially in hard-to-reach areas.
And when paired with safe practices, it’s a strong ally in keeping your retainer not just clean—but truly hygienic.
Best Practices for Cleaning a Retainer with an Ultrasonic Jewelry Cleaner
Using an ultrasonic jewelry cleaner for your retainer may sound straightforward—you drop it in, turn on the machine, and let the bubbles do their work. But there’s nuance behind what seems simple. Your retainer is not a ring or a chain. It is something that lives in your mouth, rests against your gums and teeth, and interacts with the bacteria of your oral microbiome every day. That calls for a more mindful approach.
Step One: Understand What You Are Cleaning
Not all retainers are created equal. Before using any ultrasonic cleaner, confirm the type of retainer you have:
- Hawley retainers (the classic wire-and-acrylic model) are generally durable and respond well to ultrasonic cleaning.
- Clear plastic retainers (like Essix and Vivera) are more delicate. Their thermoplastic materials can warp under heat or react poorly with harsh chemicals.
- Bonded (fixed) retainers cannot be placed into an ultrasonic cleaner at all and must be cleaned manually while still in the mouth.
So the first step is clear: know your material. Read the manufacturer’s instructions. If you are unsure, consult your orthodontist or dentist.
Step Two: Choose the Right Cleaning Solution
You should never use random household cleaners or abrasive solutions. The safest and most effective approach is to use:
- Warm distilled water (not hot)
- A mild, retainer-safe ultrasonic cleaning solution or, in a pinch, a tiny drop of clear, unscented dish soap diluted in water
Never use bleach, alcohol, or mouthwash with your ultrasonic cleaner. These can degrade both plastic and metal, and may release harmful fumes during the ultrasonic process.
If you’re using dish soap, ensure it’s phosphate-free, dye-free, and fragrance-free. Think of something so gentle that it could clean baby bottles.
Step Three: Timing and Frequency Matter
For retainers, shorter cleaning cycles are safer. Most ultrasonic jewelry cleaners have preset timers ranging from 3 to 10 minutes. Start with 3 to 5 minutes max.
Longer cycles or multiple cleanings per day are unnecessary and may weaken the structural integrity of the retainer over time, especially with clear plastic types.
For daily maintenance, ultrasonic cleaning once every two or three days is typically sufficient. Supplement it with a gentle rinse or manual brush in between.
Step Four: Rinse Thoroughly Afterwards
After cleaning, remove the retainer and rinse it under cool running water to remove any residual soap or solution. You don’t want trace chemicals lingering on a surface that spends hours in your mouth.
Let the retainer air-dry completely on a clean towel before placing it back in its case—or back in your mouth.
Optional: Sanitizing Your Cleaner
Do not forget the machine itself. Residue from previous cycles can accumulate in the tank. After every few uses, empty the basin and wipe it down with a soft cloth. You can also run a cleaning cycle with only distilled water and a bit of white vinegar to refresh the tank. Never let stale solution sit in the unit for days.
Now that we’ve walked through the process of using your ultrasonic cleaner safely, the next big question is: how does this impact your long-term oral hygiene and dental health?
Say “continue” to explore the broader health and lifestyle benefits.
Why Using an Ultrasonic Cleaner for Retainers Matters More Than You Think
Cleaning your retainer isn’t just about appearances. It’s about your health. The surfaces of your retainer come into direct and prolonged contact with your teeth and gums. Any buildup—be it plaque, calculus, or microbial biofilm—can transfer harmful bacteria back into your mouth, even after brushing and flossing. And unfortunately, manual cleaning alone isn’t always enough.
That’s where ultrasonic cleaning steps in, not just as a convenience, but as a genuinely effective hygiene measure.
Braces
The Hidden Threat: Biofilm on Retainers
According to a study published in the American Journal of Orthodontics and Dentofacial Orthopedics, retainers—especially those worn overnight—harbor bacterial communities that contribute to bad breath, gingival inflammation, and even tooth decay if not properly maintained.
Biofilms are stubborn. They cling to plastic and metal alike and are often invisible to the naked eye. Manual scrubbing might remove the surface grime, but it rarely dislodges the microscopic layers of bacteria deep in crevices or along the edges of the appliance.
Ultrasonic cleaning, however, generates cavitation bubbles that collapse with microscopic force. This process dislodges contaminants from tight spaces, effectively breaking apart biofilm colonies that toothbrushes and soaking tablets often leave behind.
Odor Reduction and Taste Neutrality
A side benefit? You’ll likely notice your retainer smells and tastes noticeably fresher. Odors on a retainer usually stem from bacterial activity, food residues, or salivary proteins stuck in micro-grooves. Regular ultrasonic cleaning can restore the neutral feel of your appliance, making it more comfortable to wear.
This is especially appreciated by teens and adults who are less likely to be consistent with manual cleaning habits.
Is It Worth Buying a Dedicated Retainer Cleaner?
Some might ask whether it’s better to buy a specialized ultrasonic cleaner for dental appliances rather than using a jewelry cleaner.
Here’s the truth: many jewelry cleaners work just fine—as long as they meet a few basic standards:
- Adjustable timer
- Power range between 35 to 45 kHz
- Non-heating or low-heat option
- Tank size that fits your retainer without crowding
If your ultrasonic cleaner checks these boxes, there’s no need to invest in a dental-specific model. The effectiveness lies in your technique and solution, not the label on the machine.
Of course, some models include UV sterilization or preset dental modes—but these are luxuries, not necessities.
What Dentists Think
Dentists increasingly recommend ultrasonic cleaning as part of a comprehensive oral appliance hygiene regimen. Many orthodontic clinics even use professional-grade ultrasonic cleaners between patient visits for items like retainers, aligners, and mouthguards.
According to the Journal of Clinical Orthodontics, ultrasonic cleaning has been shown to reduce microbial load more effectively than effervescent tablets alone, especially when combined with appropriate detergent solutions.
However, they also caution users not to rely exclusively on machines. Daily rinsing and occasional brushing with a soft toothbrush remain vital.
Taking Care of Your Retainer and Cleaner Long-Term
Even the best ultrasonic routine will not compensate for poor habits or misuse. To get the most out of your ultrasonic jewelry cleaner—and to protect your retainer—there are a few long-term considerations to keep in mind.
Regular Maintenance of Your Cleaner
It might sound ironic, but the device that cleans your retainer needs occasional cleaning too. Over time, residue from cleaning solutions, biofilm debris, and hard water minerals can build up in the tank. Rinse the tank thoroughly after each use and give it a deep clean weekly using mild detergent and a soft cloth. Avoid abrasive materials that could scratch the stainless steel.
Additionally, if your model uses replaceable filters or baskets, follow the manufacturer’s maintenance schedule to keep everything functioning smoothly.
When to Replace the Cleaning Solution
Most people make the mistake of thinking they can reuse the same solution multiple times. While that might seem economical, it’s not hygienic. Reusing dirty solution reintroduces bacteria and debris into your retainer every time you clean. As a rule of thumb, replace the solution after every cleaning session or at least daily if cleaning multiple items in succession.
Distilled water mixed with a mild, pH-balanced dental cleaner (without bleach or alcohol) provides the safest and most effective formula. Avoid using harsh detergents, dish soaps, or vinegar unless advised by your dental professional.
How Often Should You Use It?
For daily wearers, a short ultrasonic cleaning every two to three days is usually sufficient to prevent buildup. You can alternate this with manual brushing and a weekly deep soak. Over-cleaning, especially with high-intensity or heated cycles, may shorten the life of your retainer—especially if it’s made from thermoplastics like Essix or Vivera.
Fixed retainers, on the other hand, should never be cleaned using an ultrasonic device at home. These are bonded to your teeth and require professional maintenance.
Watch for Wear and Tear
Regular ultrasonic cleaning will keep your retainer looking clear and polished, but it won’t reverse wear from chewing, grinding, or improper storage. Check for signs of damage such as cracks, warping, or changes in fit. If your retainer no longer fits snugly or feels rough along the edges, it might be time to replace it.
And importantly, never clean a cracked or damaged retainer in an ultrasonic cleaner. The vibrations can worsen small fractures and make the appliance unsafe to wear.
Final Thought
There’s a quiet sense of relief in slipping on a retainer that’s clean, fresh, and comfortable—free from smells, stains, or grime. And when it only takes a few minutes in a small, countertop device, it’s easy to make ultrasonic cleaning part of your routine.
Yes, your jewelry cleaner can pull double duty for your retainer. But just like any powerful tool, it rewards those who use it with care and understanding.