


Choosing the Right Ultrasonic Cleaner for Retainers
Browse Volume:217 Classify:Support
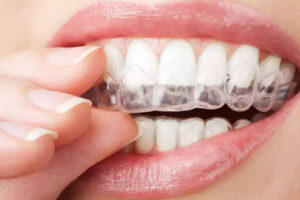
If you wear retainers daily, you’ve likely noticed how quickly they can collect buildup—calcium deposits, food particles, even traces of mouthwash. Brushing alone rarely gets them truly clean. That milky haze or faint odor can linger even after a vigorous scrub. It’s no wonder more people are turning to ultrasonic cleaners. But here’s the catch: not all ultrasonic devices are created equal, and using the wrong one could do more harm than good.
Ultrasonic cleaning may sound like a futuristic luxury, but it’s surprisingly accessible and scientifically sound. The process uses high-frequency sound waves to create tiny cavitation bubbles in water or a cleaning solution. These bubbles collapse and dislodge grime, bacteria, and invisible residue from the surface of your retainer. It’s thorough, non-abrasive, and ideal for hard-to-reach crevices. But which cleaner is best for a medical-grade plastic appliance like a retainer?
Before choosing the first device with good reviews or a sleek design, it’s worth understanding what really matters: the cleaning frequency, tank size, material compatibility, and solution safety. And perhaps most importantly, the level of gentleness—because retainers are not indestructible. Whether you wear a Hawley, Essix, or Vivera, the ideal ultrasonic cleaner should clean deeply without stressing plastic or distorting shape.
Braces
Understanding What Your Retainer Needs
Before choosing a cleaner, it helps to understand what exactly you’re trying to preserve. Most retainers are made from thermoplastic or acrylic materials that can be sensitive to heat and harsh chemicals. Even though these devices are designed for daily wear, they are not immune to damage. Excessive scrubbing, boiling water, or exposure to alcohol-based cleaners can cause warping, micro-cracks, or cloudiness over time.
Ultrasonic cleaning offers a safer, touch-free alternative, but only if the right parameters are respected. For example, Hawley retainers have a combination of acrylic and metal wiring, which means they require a balance of cleaning strength and material safety. Essix and Vivera retainers—those clear, mouthguard-like appliances—are especially prone to surface scratches if cleaned too aggressively or with the wrong detergents.
When evaluating ultrasonic cleaners for retainers, consider this: the gentler the cavitation, the lower the chance of deterioration. That’s why frequency matters. Ultrasonic cleaners typically range from 20 kilohertz to 80 kilohertz. For retainers, a device operating around 40 to 60 kilohertz is ideal. It creates finer bubbles that are less likely to damage soft surfaces, while still being powerful enough to lift off biofilm and plaque.
Also, pay attention to cycle duration. A short 2- to 5-minute cleaning is usually sufficient for retainers. Prolonged exposure to ultrasonic waves, even at safe frequencies, can cause stress to the material over time. Devices that allow you to adjust the timer manually—or that have preset short cycles—offer greater control and peace of mind.

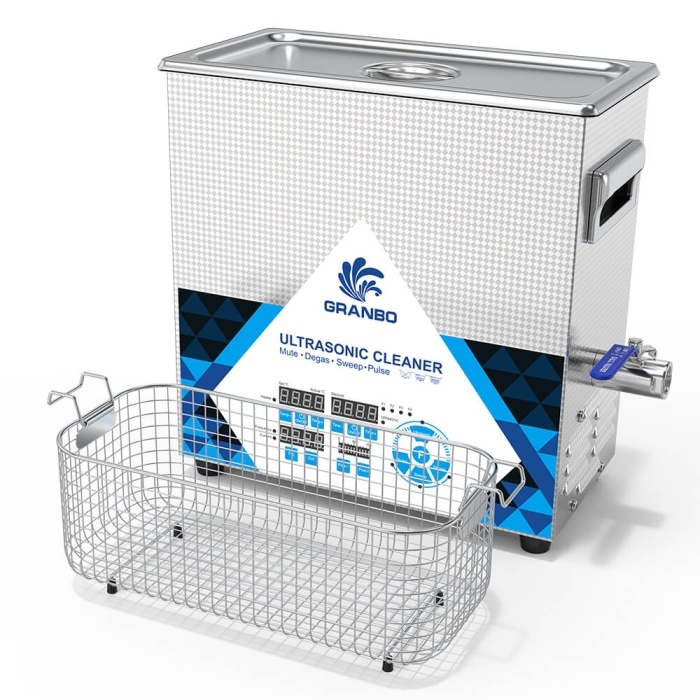
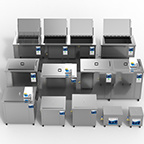
Granbo GC01 Ultrasonic Cleaner – Compact and Portable for Home and Travel Use
Key Features to Look For in a Retainer-Safe Ultrasonic Cleaner
Not all ultrasonic cleaners are built the same, and when it comes to retainers, certain features can make all the difference between gentle care and gradual wear. The most important thing is to think beyond just “does it clean” and focus instead on how it cleans.
A good ultrasonic cleaner for retainers should have a frequency of at least 40 kilohertz. Why? Because higher frequencies produce smaller cavitation bubbles, which are gentler on delicate materials like thermoplastics. Lower frequencies, while more aggressive, can create micro-damage on soft surfaces and cause hazing or brittleness over time.
Adjustable timers are another crucial consideration. A one-size-fits-all approach rarely works when you’re dealing with customized dental appliances. Some retainers may only need a 2-minute cycle, while others, especially those with metal components or buildup, might benefit from 5 minutes. Having the ability to control this gives you flexibility without overexposure.
Temperature control can also make or break your cleaning experience. Most orthodontists and dental material manufacturers advise against exposing retainers to hot water, which can warp their shape. Some ultrasonic cleaners include built-in heaters, but these should either be disabled or used with extreme caution. If the cleaner does not allow you to adjust the temperature, you’re better off pre-heating your water to lukewarm before adding it to the tank.
A stainless steel cleaning tank is ideal for durability, but more importantly, it ensures a smooth surface that won’t scratch your retainer. Look for tanks with a capacity of 400 to 750 milliliters—enough space for your device to rest without touching the sides or bottom, which could cause uneven cavitation or minor damage.
And then there’s the cleaning basket. Using one is not optional. It keeps your retainer suspended in the tank, allowing ultrasonic waves to circulate fully without causing the item to rattle against the hard metal surface. Some models even offer specially designed orthodontic inserts that cradle retainers securely during cleaning.
Choosing the Right Cleaning Solution for Retainers
An ultrasonic cleaner is only as good as the liquid it’s working with. Water alone—while technically capable of conducting ultrasonic waves—is often not enough to break down biofilm, calcium deposits, or the invisible layers of bacteria and saliva proteins that cling to a retainer after daily wear.
For retainer cleaning, the safest and most effective choice is a mild, non-corrosive cleaning solution designed specifically for dental appliances or optical-grade plastics. These solutions are often neutral to mildly alkaline in pH (typically between 7.0 and 9.5), ensuring that the cleaner is tough on grime but gentle on plastics, resins, and metal solder joints.
Avoid cleaners that contain ammonia, bleach, alcohol, or any aggressive degreasers. These may damage the structural integrity of the retainer, particularly those made from thermoplastic materials like Essix or Zendura. Some commercial ultrasonic cleaning solutions advertise antimicrobial or anti-tartar properties, but always double-check their ingredient list and ensure they’re marked safe for dental or orthodontic use.
If you prefer a DIY approach, a few drops of clear, unscented dish soap in distilled water can work in a pinch—especially if the retainer is only lightly soiled. However, this is not recommended for daily use, and you should avoid any formulation that includes moisturizers or antibacterial agents, which may leave residues behind or interfere with the cavitation process.
Once you’ve chosen your solution, always make sure it’s well-dissolved before inserting your retainer. Stirring it in the tank before operation begins ensures even distribution, which is critical to uniform cleaning results. And remember—never use boiling or very hot water, as this can permanently warp retainers or weaken their attachments.
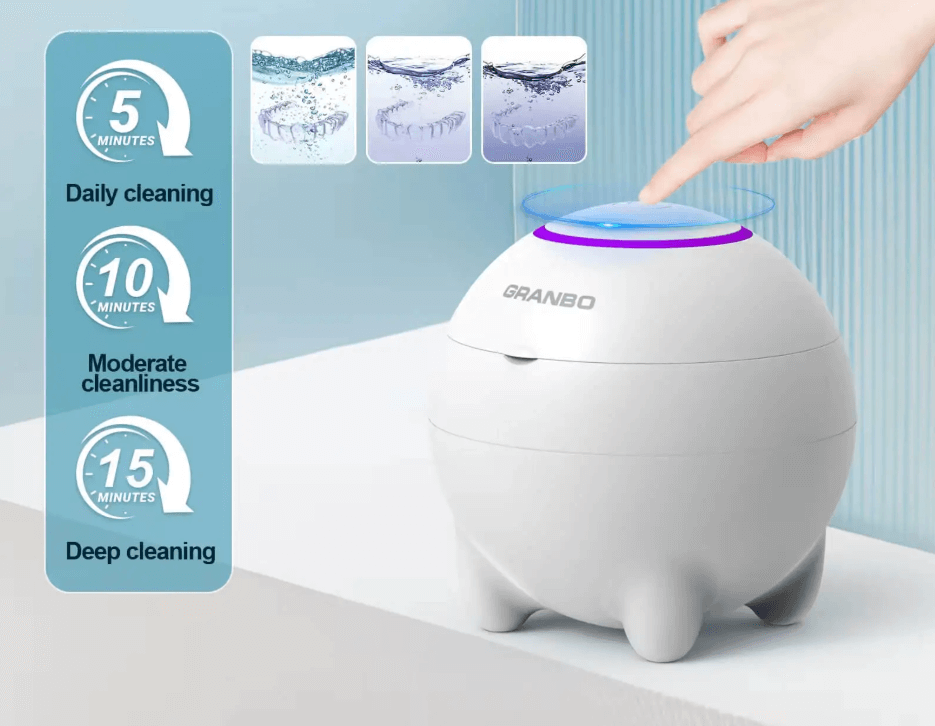
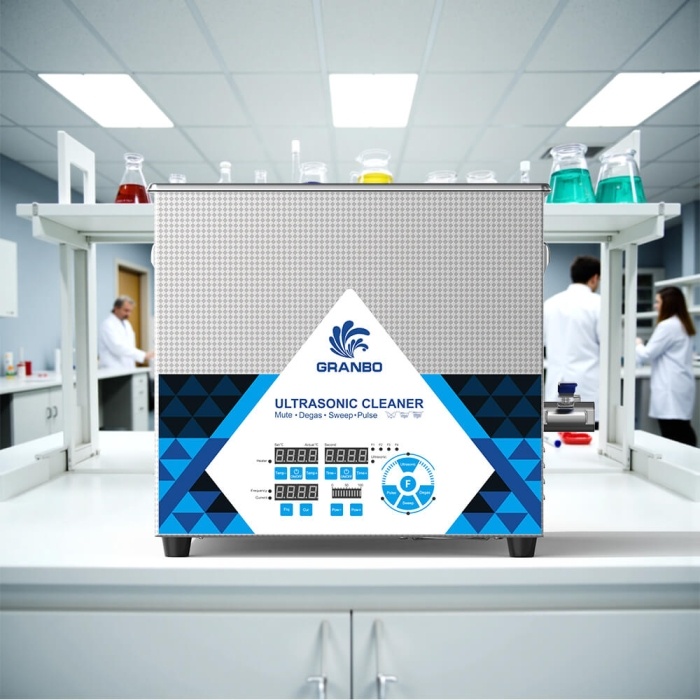
Granbo GC01 – Compact & Portable Design for Home and Travel
Best Practices for Cleaning Retainers at Home
Owning an ultrasonic cleaner can transform your oral hygiene routine, but the machine itself is only part of the equation. Knowing how to use it effectively makes the difference between a retainer that’s merely rinsed and one that’s truly clean and hygienic.
Start by brushing your retainer gently under lukewarm water with a soft toothbrush to remove any visible debris. This step helps the ultrasonic cleaner focus on the microscopic particles and biofilm that toothbrushes cannot reach. You don’t need to use toothpaste—in fact, most dental professionals advise against it, as toothpaste can scratch soft plastics and create places for bacteria to hide.
Once the visible dirt is cleared, place your retainer in the cleaning basket—never directly on the tank floor—and fully submerge it in the prepared solution. A standard cleaning cycle of 3 to 5 minutes is usually sufficient. For more stubborn buildup or if you’re cleaning a retainer after several days of non-use, you might extend the cycle up to 10 minutes, depending on the power level of your ultrasonic unit.
After the cleaning cycle is complete, always rinse the retainer under clean running water to remove any residual cleaning solution. Pat it dry with a clean, lint-free cloth or allow it to air dry before wearing or storing it.
For daily use, aim to clean your retainer once per day if you wear it full-time, or at least every few days if you use it only at night. Weekly deep cleans can help remove long-term buildup and maintain transparency in clear retainers.
A bonus tip—if your ultrasonic cleaner has a heating function, it’s best to disable it for retainers. Most dental plastics are sensitive to high temperatures, and even mild heat can accelerate wear or warping.
Common Mistakes to Avoid and Features That Actually Matter
When shopping for an ultrasonic cleaner for your retainers, it’s easy to get caught up in marketing buzzwords—digital display, turbo mode, heated bath. But in reality, not all of these features add value, and some might even work against your retainer’s longevity.
One common mistake is assuming that more power means better cleaning. While a high-wattage unit can certainly generate intense cavitation, retainers are made of thermoplastics or acrylics, which are soft and sensitive. Excessive ultrasonic intensity might degrade the material over time or cause micro-cracks that weaken structural integrity. Look for a model with adjustable power settings or one designed specifically for dental appliances.
Another pitfall is heating. Many industrial ultrasonic cleaners feature built-in heaters to enhance cleaning for metal tools and mechanical parts. However, retainers should not be cleaned in hot solutions. Heat can deform their shape, especially for clear aligner trays or Hawley retainers. If your unit has a heating function, ensure it can be disabled.
Also, avoid skipping the basket. Letting your retainer sit directly on the tank floor may expose it to uneven vibrations or physical damage from the transducer area. A properly suspended retainer allows for uniform ultrasonic wave exposure and prevents unnecessary wear.
As for features worth prioritizing, timer controls are invaluable. A preset 3 to 5-minute cycle keeps you from accidentally overwashing. Compact size and low noise operation are also useful if you’re using the unit daily in a home setting. And a removable tank, while not essential, does make cleaning up after each use a lot more convenient.
Finally, pay attention to certifications or reviews that indicate dental-grade or FDA-approved use. A cleaner used on oral appliances should meet certain hygiene and safety standards—not just general consumer electronics ratings.
Ultrasonic Cleaning vs Soaking Tablets vs Manual Brushing: What Actually Works?
If you’ve ever stood at your bathroom sink wondering whether to drop your retainer into a fizzing tablet solution or scrub it with a toothbrush, you’re not alone. There’s no shortage of cleaning methods out there—but how do they really stack up against ultrasonic cleaning?
Let’s start with the classic: manual brushing. It’s hands-on, requires no special equipment, and helps remove visible debris. But while brushing can dislodge food particles and surface plaque, it often falls short in cleaning fine grooves, wire joints, and the inner contours of molded retainers. Plus, brushing too hard with regular toothpaste can cause micro-abrasions, dulling the retainer’s surface and creating spots where bacteria cling more easily.
Soaking tablets, on the other hand, promise convenience. Pop a tablet into a glass of water, drop in your retainer, and walk away. These solutions often contain ingredients like sodium percarbonate or citric acid to break down biofilm and stains. They’re good at sanitizing, but less effective at physically dislodging particles in tight spots. And some users report a lingering aftertaste or chemical odor, which can be unpleasant when you next pop the retainer back in.
This is where ultrasonic cleaning quietly shines. By generating microscopic cavitation bubbles that collapse near the surface of your retainer, ultrasonic cleaners physically shake off grime—even in crevices where bristles and soaking solutions can’t reach. The result? A retainer that looks and feels cleaner, often in less than five minutes.
To visualize the comparison clearly, here’s a practical side-by-side overview:
| Method | Cleaning Effectiveness | Time Required | Best For | Limitations |
|---|---|---|---|---|
| Manual Brushing | Moderate (surface only) | 2–5 minutes | Quick cleaning, low cost | Misses crevices, risk of scratching |
| Soaking Tablets | Moderate to High (sanitization) | 15–30 minutes | Disinfection and stain removal | May leave residue, less mechanical cleaning |
| Ultrasonic Cleaning | High (deep mechanical cleaning) | 3–5 minutes | Full cleaning including crevices | Requires device, careful use needed |
That said, the best results often come from combining methods: for example, brushing lightly to remove loose debris, then using an ultrasonic cleaner once a day or a few times per week, especially after meals. Many orthodontists now recommend this hybrid approach to extend the lifespan of retainers and maintain oral hygiene.
How Much Should You Expect to Spend on an Ultrasonic Cleaner for Retainers?
The market for ultrasonic cleaners is broad, ranging from under twenty dollars to several hundred, depending on the intended use, quality of components, and feature set. But does a higher price always translate to better cleaning? Not necessarily. The trick is to understand what you’re paying for—and what features are truly valuable for cleaning retainers.
Let’s break this down.
At the low end, you’ll find ultrasonic cleaners in the $20 to $40 range. These are typically made for jewelry or eyeglasses, and while some do an acceptable job on retainers, they may have limitations. The tank is often small, sometimes too small for larger mouthguards or dual arch retainers. The frequency may also be fixed, without options to adjust time or power levels. That said, if your needs are minimal and you plan to clean a simple plastic retainer a few times a week, this could be a budget-friendly starting point.
The mid-range category—usually priced between $50 and $100—is where things start to get interesting. At this level, you’ll find devices with adjustable timers, stainless steel tanks, and better build quality. Some models even include gentle heating options, which can improve the performance of enzymatic cleaning solutions. These machines are typically quiet, compact, and robust enough for daily use. For most retainer users, this range hits the sweet spot between affordability and effectiveness.
Beyond $100, you enter semi-professional territory. These ultrasonic cleaners often come with higher-frequency transducers, broader timing options, and more durable components. Some are capable of handling more delicate items like dental surgical tools or jewelry with gemstones. Unless you’re using the device for multiple purposes or have particularly sensitive dental gear, this price range may be overkill for simple retainer care—but it offers peace of mind for users who demand precision and longevity.
To make this more tangible, here’s a quick table comparing price ranges and what you get at each level:
| Price Range | Features | Best For | Limitations |
|---|---|---|---|
| $20–$40 | Basic single-frequency, small tank, limited timer | Occasional use, basic retainers | Small size, fixed power, may not last long |
| $50–$100 | Adjustable timer, better materials, optional heating | Daily cleaning, multi-retainer households | Larger footprint, mid-range noise |
| $100+ | Advanced controls, high-quality components, multipurpose use | Precision cleaning, long-term investment | Higher upfront cost, sometimes unnecessary features |
A final tip: resist the temptation to choose solely based on price or aesthetics. What matters most is how well the machine suits the specific type of retainer you wear, and how convenient it is to use and maintain.
What Cleaning Solutions Are Safe and Effective for Retainers?
The general rule is: use a solution that is both effective at breaking down biological debris and safe for the materials in your retainer. Most retainers are made of acrylic, thermoplastic, or a combination of clear plastic and metal. These materials can be damaged by overly harsh chemicals, high alkalinity, or strong oxidizers. That means no bleach, no ammonia, and no alcohol-based solvents.
So what can you use?
Mild dish soap is surprisingly effective for everyday cleaning. A few drops in warm water will help break down saliva proteins, oils, and food particles. It is gentle enough for most retainers but does not offer the antimicrobial action of specialized solutions.
Enzymatic cleaners, which are specifically designed for dental appliances, are the gold standard. They contain protein-digesting enzymes that help dissolve organic buildup without damaging delicate plastics or adhesives. These solutions are usually biodegradable, pH-balanced, and safe for daily use. Most dissolve in water and work best when paired with ultrasonic agitation.
Effervescent denture tablets are another option, but be cautious. Some contain peroxides or sodium bicarbonate which can cause clouding or wear over time, especially if the retainer is made from softer materials. If you use tablets, choose those explicitly labeled for use with clear aligners or retainers.
On the flip side, here’s a helpful breakdown of what to use and what to avoid:
| Solution Type | Safe for Retainers? | Notes |
|---|---|---|
| Mild dish soap | Yes | Gentle and affordable, good for daily cleaning |
| Enzymatic retainer cleaner | Yes | Highly effective for biofilm and buildup |
| Denture tablets | Sometimes | Check ingredients; avoid daily use for soft plastics |
| Hydrogen peroxide | No | May damage metal and plastic components over time |
| Bleach or ammonia | No | Harsh and potentially toxic, never recommended |
| Alcohol-based solutions | No | Can dry out and crack plastic or degrade adhesives |
If you’re using a store-bought cleaning solution, always check the label. Look for a neutral to slightly alkaline pH, ideally between 7 and 10. This range supports effective cleaning without corroding metal or softening plastic.
Safe Use of Ultrasonic Cleaners for Retainers: A Gentle Ritual
It might be tempting to throw your retainer into the tank and walk away, but a little attention to detail will help you avoid the common mistakes that lead to damage, warping, or poor hygiene.
Step one is preparation. Always rinse your retainer under lukewarm water first to remove food debris or saliva residue. You do not want these particles floating in your cleaning solution because they can re-deposit elsewhere or reduce the cavitation effectiveness. If your retainer has metal parts, a quick visual check is also a good idea—look for signs of corrosion, loosened wires, or cracks.
Use the right container within the cleaner. Many ultrasonic devices include a removable basket or small tray to prevent direct contact with the tank bottom. Never place the retainer directly on the bottom of the ultrasonic cleaner. Not only can this reduce the effectiveness of the ultrasonic waves, but it may also lead to micro-damage or vibration stress over time.
Cycle duration matters. For retainers, a cycle of 2 to 5 minutes is usually sufficient. Running the machine for longer may not make the retainer cleaner—it might just increase wear on the plastic and metal. If you are using an enzymatic cleaner, follow the time recommendations on the label, but in general, the ultrasonic action speeds up the cleaning, so you rarely need extended soaking.
Water temperature should stay below 45 degrees Celsius, or about 113 degrees Fahrenheit. Hotter water may warp the plastic or weaken adhesives, especially on retainers with bonded parts or attachments.
After the cleaning cycle, always rinse thoroughly under clean water to remove any lingering soap, enzymes, or dislodged debris. Then dry your retainer gently with a soft cloth or let it air dry on a clean surface.
As with any cleaning method, consistency is key. Ultrasonic cleaning once a day might be overkill and could shorten the life of your retainer. However, using it two or three times a week—supplemented by manual brushing with a soft toothbrush—creates a well-balanced care regimen.
Ultrasonic Cleaning vs. Traditional Methods: A Comparison
For decades, retainer users have relied on soaking tablets, warm water rinses, or soft-bristled toothbrushes to clean their appliances. These methods work to an extent, but they often fail to address buildup in crevices, especially if the retainer has ridges, hinges, or wire elements.
Brushing, for instance, is effective at removing surface plaque and food particles. But its reach is limited. Tiny scratches from aggressive brushing can also create a home for future bacterial growth. Worse, using regular toothpaste—a product designed for tooth enamel—can be too abrasive for plastic and acrylic materials, leaving the surface dull over time.
Soaking tablets, on the other hand, offer a chemical solution to the problem. These tablets typically rely on oxidizing agents or enzymes to break down grime. They work decently for deodorizing and loosening biofilm but tend to be slow and passive. Without any agitation, gunk lodged in tight grooves or around wires may remain.
Ultrasonic cleaning combines chemistry with mechanical action. The cavitation effect—millions of microscopic bubbles forming and imploding—reaches into areas no brush can touch. When paired with a mild detergent or enzyme-based solution, it removes both visible grime and invisible bacteria far more thoroughly than soaking alone.
So while traditional methods have their place for quick or emergency cleaning, ultrasonic cleaners stand out in terms of depth, consistency, and time efficiency. For people who wear retainers every night or for long durations, this level of hygiene can make a significant difference—not only in oral health but also in comfort and appearance.
What to Look for in the Best Ultrasonic Cleaner for Retainers
Not all ultrasonic cleaners are made equal, and while many devices on the market can technically clean retainers, only some are truly optimized for the task. Choosing the right one requires thinking beyond just size and price—you need to consider features that protect the material of your retainer, ensure deep cleaning, and support your lifestyle.
Let’s start with frequency, because this is one of the most critical and least understood factors. Most dental appliances like retainers are made of acrylic, thermoplastic, or a combination of plastic and metal wires. These materials respond best to ultrasonic frequencies in the 40 kHz to 60 kHz range. Lower frequencies (like 28 kHz) are more aggressive and might damage softer plastics, while higher frequencies (above 60 kHz) are gentler but may not offer as thorough a clean for biofilm stuck in tight spaces.
Timer settings are another consideration. Ideally, the ultrasonic cleaner you choose should offer adjustable time cycles. Retainers typically don’t require extended cleaning—two to five minutes is often sufficient—so a cleaner with preset cycles can save time and reduce the risk of overexposure, which could potentially warp or degrade delicate components over the long term.
Next is tank size and shape. While a large cleaner may seem like a good investment for multi-use cleaning (jewelry, glasses, etc.), a small-to-medium tank designed for dental items is usually better for hygiene. Smaller tanks heat up and clean faster, and you won’t waste cleaning solution. More importantly, a retainer should be suspended slightly above the tank bottom, ideally in a basket or tray. This prevents it from directly contacting the transducer surface, protecting both the retainer and the device.
Degas functions, if included, can further enhance cleaning. These remove trapped air bubbles in the solution before the cleaning process starts, allowing for more consistent cavitation. While not mandatory, it’s a nice bonus for those who prioritize meticulous cleanliness.
Ease of maintenance should also play a role in your decision. Look for removable baskets, easy-to-drain tanks, and units made of stainless steel interiors for durability. If you use cleaning solutions that leave residue, this will save you considerable cleaning time over months of use.
And finally, there’s the often-overlooked factor of noise. Ultrasonic cleaners inherently produce a humming sound due to the high-frequency vibrations, but some models are noticeably quieter than others. If you plan to clean retainers daily in a quiet home or at night, quieter models can make a big difference.
Pairing the Right Cleaning Solution with Your Ultrasonic Cleaner
Now that you’ve chosen the right ultrasonic cleaner, it’s time to think about what actually goes into the tank. After all, the device is only as good as the solution it’s working with.
Many people assume that plain tap water is sufficient, but for retainers—especially those worn daily and exposed to saliva, food particles, and bacteria—a targeted cleaning solution significantly boosts results. Tap water may contain minerals that interfere with ultrasonic performance, and it lacks the chemical action needed to break down biofilm and protein buildup.
Instead, distilled water is your best base. It prevents mineral residue and maximizes cavitation efficiency. To that, you can add a mild, non-corrosive cleaning agent specifically designed for dental appliances or plastic materials. Avoid household bleach, harsh detergents, or alcohol-based cleaners, which can degrade retainer materials over time.
Look for solutions that are:
- pH neutral or mildly alkaline, ideally in the pH range of 7 to 9.5
- Free from ammonia and alcohol, which can cloud or weaken plastic
- Biodegradable and non-toxic, especially important if you’re handling them daily
You can also find enzyme-based solutions, which are particularly effective at breaking down organic debris and biofilm without harsh chemicals. These are commonly used in professional dental labs and are increasingly available for home use.
As a general rule, use only a few drops or a capful of solution in a full tank of distilled water—more is not always better. Overconcentration can leave residue on the retainer or damage the device. Always follow manufacturer guidelines for both the cleaner and the additive.
Once your retainer is clean, rinse it thoroughly under running water before placing it back in your mouth. Any residual cleaner, even if labeled safe, should be removed to avoid irritation or aftertaste.
Creating a Consistent Cleaning Routine for Your Retainer
Even with the best ultrasonic cleaner and the most suitable solution, results hinge on one crucial habit: regularity. Think of your retainer like your teeth—it needs daily care, not just occasional attention. Skipping days allows bacteria and plaque to accumulate, not only creating odor but also posing a risk to your oral health.
So how often should you use your ultrasonic cleaner for retainers? Daily use is ideal, especially if you wear your retainer every night. A quick cycle in the morning while you brush your teeth is usually enough to remove the bacteria and buildup accumulated overnight.
However, that doesn’t mean you should never clean by hand. In fact, a combination of ultrasonic and manual cleaning provides the best of both worlds. Ultrasonic cleaning tackles the hard-to-reach biofilm lodged in crevices, while soft brushing with a mild toothpaste or retainer-safe gel can keep the surface sparkling. Aim for ultrasonic cleaning once a day and manual cleaning two to three times per week to supplement.
Also consider periodic deep-cleaning days. About once a week, let your retainer soak a bit longer—say 10 minutes instead of the usual 3 to 5—using a fresh batch of solution. This ensures any lingering deposits, especially calcium or protein layers, get fully broken down.
It’s also worth noting that retainer cases and storage containers should be cleaned too. Use the same ultrasonic cleaner (after rinsing it out) to give the case a quick clean once a week. This avoids re-contaminating your freshly cleaned retainer.
Lastly, pay attention to signs of wear. Ultrasonic cleaners are gentle, but if your retainer shows signs of cracking, yellowing, or warping, it may be time to consult your orthodontist—not just for a new appliance, but also to review whether your cleaning methods are appropriate for your specific retainer material.
Common Mistakes to Avoid When Cleaning Retainers with Ultrasonic Cleaners
You may have invested in a quality ultrasonic cleaner and even adopted a consistent cleaning routine—but the tiniest oversight can reduce its effectiveness or worse, cause damage to your retainer. It’s worth highlighting a few mistakes users frequently make, often with good intentions, that could sabotage their oral hygiene efforts or compromise the appliance itself.
One of the most frequent errors is using the wrong cleaning solution. While it might be tempting to grab any household detergent or mouthwash, many of these contain harsh chemicals, alcohol, or whitening agents that can degrade the plastic polymers of your retainer. Stick with retainer-safe cleaning tablets or ultrasonic-specific solutions with a pH between 7 and 10. Avoid anything overly acidic or alkaline, as it can cloud, crack, or weaken the material over time.
Another common misstep is over-cleaning. It might sound odd—after all, isn’t cleanliness the goal? But using your ultrasonic cleaner for 10 minutes or more every single day can, over time, exert unnecessary stress on the material. Most retainers only need about 3 to 5 minutes of ultrasonic cleaning per session. Prolonged exposure may soften certain thermoplastics, causing warping or looseness that affects fit.
Some users also make the mistake of placing retainers directly on the bottom of the cleaning tank, skipping the mesh basket. While this might seem like a harmless shortcut, direct contact with the vibrating base can cause micro-damage, both to the tank and to the retainer. Always suspend your retainer in the basket to allow even wave distribution and prevent physical wear.
Temperature matters, too. Never use hot water to speed up cleaning. Heat can distort the plastic or cause metal elements to expand at different rates, weakening joints or fit. Stick to lukewarm or room-temperature water—most ultrasonic cleaners are designed to operate within that safe thermal range anyway.
Finally, avoid the trap of letting your retainer air-dry for too long post-cleaning. While letting it sit for a few minutes is fine, leaving it exposed for hours on the counter can lead to dust, airborne bacteria, or even pet fur getting lodged onto the freshly cleaned surface. Always pat your retainer dry with a clean, lint-free cloth and store it in its case once it’s fully dry.
These may sound like small details, but over time, these habits shape the lifespan of your retainer—and by extension, the health of your teeth and gums.
Final Thoughts: Choosing with Confidence
Finding the right ultrasonic cleaner for your retainer is not about picking the flashiest gadget or the most expensive one. It is about choosing a tool that quietly supports your health goals, aligns with your lifestyle, and treats your retainer with the care it deserves. A well-designed ultrasonic cleaner becomes an invisible ally in your daily routine, one that gives you cleaner breath, clearer aligners, and a bit more peace of mind every time you reach for your case.
At the heart of it, retainers represent discipline—months or years of orthodontic work condensed into a slim plastic mold you wear each night. Taking care of them should feel like a natural continuation of that commitment. An ultrasonic cleaner, when chosen wisely, simplifies that care. It lets you clean deeply without scrubbing, preserve form without wear, and maintain hygiene without guesswork.
So whether you are new to retainers or have been wearing them for years, investing in the right ultrasonic cleaner can feel like a small change, but one that pays off daily. The key is to focus on gentleness, adjustability, and compatibility—not just in terms of machine specs, but in how well the cleaner fits into the rhythms of your life. A few minutes of thought today can translate into years of clarity, comfort, and confidence.