


How to Use an Ultrasonic Cleaner Correctly for Best Results
Browse Volume:179 Classify:Support
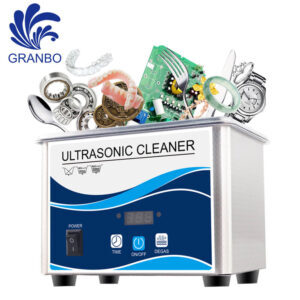
Ultrasonic cleaners have become one of those surprisingly satisfying gadgets—tiny tanks of water that hum gently and work wonders on everything from jewelry to tools. But beyond the satisfying before-and-after shots, how do you actually use one correctly? And how do you ensure you’re getting the most out of your machine without risking damage to your precious items? Let’s break it down together in a friendly, detailed way that leaves no question unanswered.
The Magic Behind Ultrasonic Cleaning
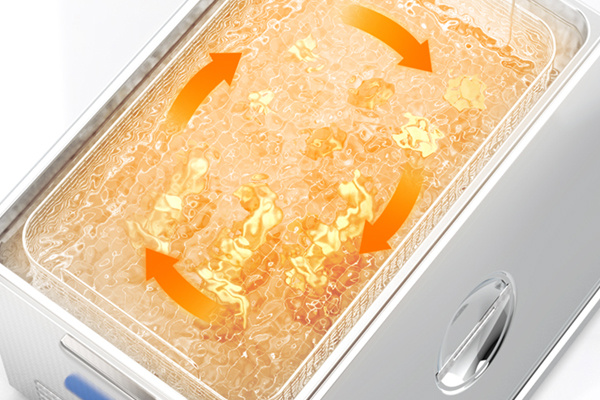
At the heart of every ultrasonic cleaner is a simple but powerful idea: sound waves, typically in the range of 20-80kHz, move through liquid, creating microscopic bubbles. When these bubbles collapse, they release tiny shockwaves that dislodge dirt, oils, and grime from surfaces—even in places your fingers or brushes could never reach. This process is called cavitation, and it’s the secret sauce that makes ultrasonic cleaning so effective.
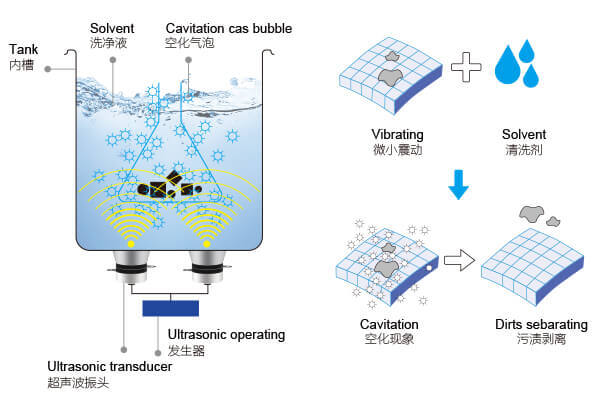
The Principle Behind Ultrasonic Cleaning
Setting Up Your Ultrasonic Cleaner
First, choose a sturdy, level surface away from sensitive electronics (since the cleaner may cause minor vibrations). Fill the tank with clean water, and if necessary, add a few drops of a cleaning solution suitable for the items you’re cleaning—mild dish soap works for general use, while specialized solutions are better for specific materials.
Place your items in the basket or tray (never directly on the tank bottom, as this can damage both item and machine). Ensure they’re spaced apart so the cavitation bubbles can reach every surface. Close the lid securely.
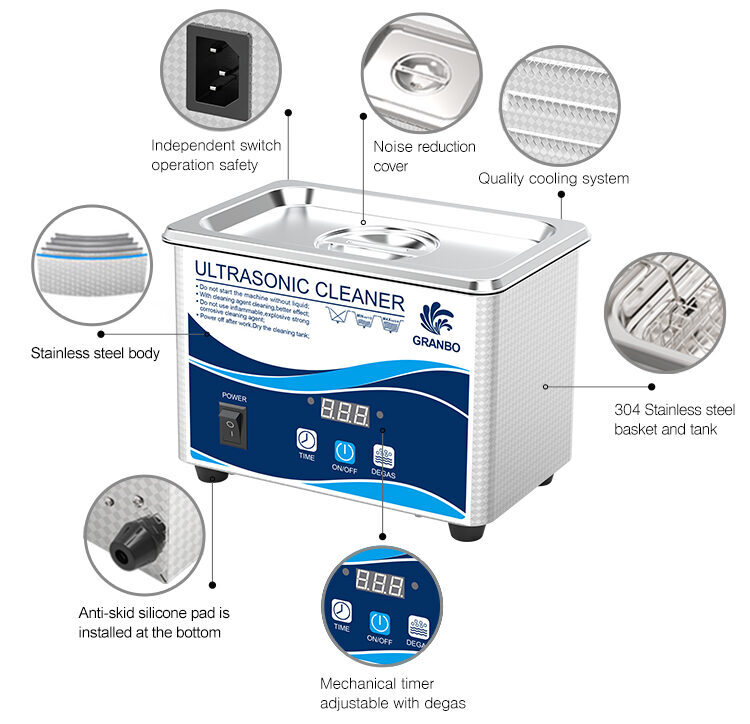
GA008G Ultrasonic Cleaning Machine Features
The Cleaning Process
Set the timer based on what you’re cleaning: jewelry usually takes 3-5 minutes, while more stubborn grime on tools may need 10 minutes or more. As the machine runs, you’ll hear a soft buzzing or humming, and the water may appear cloudy as dirt lifts away. Avoid the temptation to extend the cycle excessively—more time doesn’t always mean cleaner, and overdoing it can risk delicate items.
If your unit has a heater, use it with care. Warm water can improve cleaning efficiency, but excessive heat can damage certain items, especially those with glued components or delicate stones.
What Can Go In—and What Should Stay Out
Ultrasonic cleaners are perfect for:
- Solid metal jewelry (gold, silver, platinum)
- Hard gemstones (diamonds, sapphires)
- Watch bands (not the watch head unless waterproof-rated)
- Dental appliances
- Small machine parts
Avoid cleaning:
- Porous stones (opal, turquoise, lapis lazuli)
- Soft or glued-together pieces
- Wooden items
- Electronics unless designed for immersion
Common Pitfalls and How to Avoid Them
- Overloading the tank: Crowding prevents bubbles from reaching all surfaces.
- Wrong solutions: Never use flammable liquids, bleach, or harsh chemicals.
- Ignoring item compatibility: Check if your item is suitable for ultrasonic cleaning.
- Running empty: This can damage the machine.
Common Household Items: Detailed Cleaning Guide
| Item | Recommended Solution | Cleaning Time | Removes |
|---|---|---|---|
| Eyeglasses (with coating) | Clean water + 5-6 drops dish soap or lens cleaner | 20-30 sec | Dust, oils, smudges |
| Jewelry (gold/silver) | Water + dish soap OR diluted silver/gold cleaner in beaker | 3-5 min | Dirt, oils; oxidation (if using cleaner) |
| Retainers/Dentures | Water + cleaning tablet or mild detergent | 5-10 min | Plaque, food debris |
| Medical instruments | Water + multi-enzyme cleaner, 30°C+ | 12-15 min | Blood, organic residue |
| Fountain pens | Warm water soak + ultrasonic with water | 2-3 min | Ink residue |
| Airbrush parts (water-based) | Water + isopropanol | 3-5 min | Paint, pigment |
| Airbrush parts (oil-based) | Water + ethyl acetate (in external container) | 3-5 min | Oil-based paint |
Comparing Cleaning Solutions
| Solution Type | Best For | Notes |
|---|---|---|
| Plain water | Light dust, fingerprints | Gentle but less effective on oils |
| Dish soap + water | General dirt, oils | Affordable, safe for most items |
| Jewelry-specific solution | Gold, silver, diamonds | Follow label instructions |
| Industrial cleaning fluid | Tools, machine parts | Ensure non-flammable; follow safety guidelines |
Practical Examples and Case Studies
Consider a customer who regularly cleans silver jewelry. Using plain water alone, the tarnish stayed put. But adding a drop of mild soap and limiting cleaning cycles to 5 minutes kept the jewelry bright without damaging fine details. On the flip side, a hobbyist cleaning watch bands learned the hard way that overfilling the tank led to clattering parts and scratches. The solution? Fewer pieces at a time, properly spaced.
Environmental and Maintenance Tips
Dispose of used solutions responsibly—don’t pour solvents down the sink. Rinse and dry your tank regularly to prevent buildup. Change the water frequently to avoid re-depositing dirt. And remember: ultrasonic cleaning complements, not replaces, good manual care.
Choosing the Right Ultrasonic Cleaner
| Feature | What to Look For | What to Avoid |
|---|---|---|
| Frequency | 40kHz+ for jewelry, higher for delicate items | Low frequency with no specs |
| Tank material | Stainless steel | Plastic tanks |
| Power | 30W+ small unit | Weak units under 15W |
| Reviews | Detailed, use-case focused | Vague, overly generic |
Myth Busting
- “Longer cycles mean cleaner items.” Not always—overcleaning can damage delicate parts.
- “Any cleaning fluid works.” No—use only non-flammable, approved solutions.
- “It’ll polish or restore damaged items.” Ultrasonic cleaning removes dirt, not scratches or wear.
Final Thoughts
Mastering how to use an ultrasonic cleaner is like learning any tool: it takes a mix of curiosity, respect for the machine’s power, and a little patience. When done right, it’s one of the most rewarding, time-saving devices you’ll add to your cleaning arsenal. And the gleam of a freshly cleaned item? That speaks for itself.