


Mastering the Use of Ultrasonic Cleaners at Home and Beyond
Browse Volume:167 Classify:Support
It’s a curious thing—how something you can barely hear can so thoroughly clean what your hands often can’t. Ultrasonic cleaners have quietly earned their place on countertops, in labs, and even in the toolkits of collectors and mechanics. Yet, for something so seemingly straightforward—add water, hit start—there’s a surprising amount of nuance in doing it right. If you’ve ever found yourself wondering how to use an ultrasonic cleaner properly, not just to get the job done but to extend the life of both your items and the cleaner itself, you’re in the right place.
Understanding the Ultrasonic Cleaning Process: More Than Just Bubbles
Ultrasonic cleaning works by generating high-frequency sound waves (usually between 20 kHz and 40 kHz) that create microscopic bubbles in a liquid medium—typically water or a specially formulated solution. These bubbles rapidly form and collapse in a process called cavitation, which produces intense scrubbing action on a microscopic level.
But cavitation isn’t simply random chaos; it’s a calculated release of energy that gently but effectively lifts off dirt, oil, oxidation, and even biological contaminants from surfaces that are hard to reach with conventional cleaning. What makes it powerful isn’t force, but consistency and precision. From surgical instruments to antique coins, the process is both thorough and remarkably gentle—if you use it right.
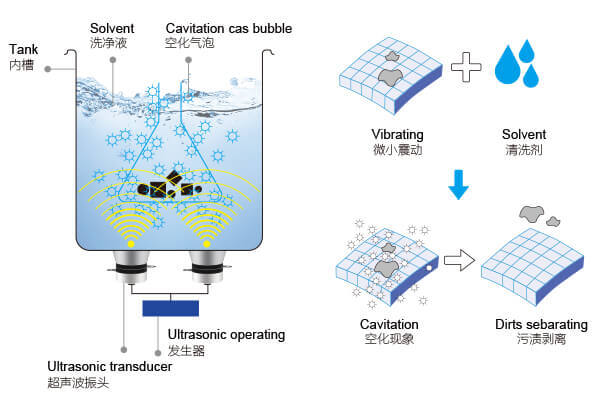
The Principle Behind Ultrasonic Cleaning
Preparing the Ultrasonic Cleaner: Setup for Success
Before pressing that power button, your preparation defines the outcome. Begin by choosing the right tank size—ensure your item is fully submerged without touching the bottom or sides. Add distilled water into the tank; it minimizes mineral residue and enhances cavitation.
Next comes the cleaning solution. Some users think pure water will do the trick, but unless you’re cleaning already spotless glass, it likely won’t suffice. For jewelry, opt for mild ammonia-free solutions. For carburetors or engine parts, use a degreasing solution formulated for ultrasonic use. For surgical tools, enzymatic or enzymatic-neutral pH cleaners are often recommended.
Always follow the solution manufacturer’s dilution instructions. An overly concentrated mix can damage sensitive items, while too little won’t clean effectively.
Now, here’s something most overlook: degas mode. Running your cleaner for 5–10 minutes without items inside lets trapped air escape from the solution, allowing for optimal cavitation. Skip this step, and your cleaning may only be half as effective.
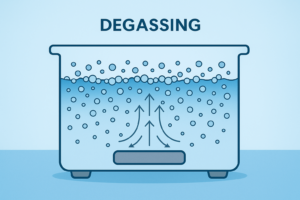
Degassing
The Cleaning Process: Time, Temperature, and Technique
After degassing, gently place the items into a mesh basket or tray (never directly on the bottom of the tank). Position them in a way that prevents overlap—ultrasonic waves don’t travel well through solid barriers.
Set the temperature. Most cleaning is effective between 40°C to 60°C. For oil and grease, aim closer to 60°C. For delicate items, stick with room temperature or a slight warmth. Then, set your timer—usually 3–10 minutes is sufficient. Over-cleaning can dull surfaces or loosen adhesives, especially in jewelry and optics.
If you’re cleaning something particularly grimy, like bike parts or old coins, you might want to pause halfway through, stir gently (with a non-metallic tool), or even run a second cycle. It’s much better than blasting your item with an unnecessarily long session.
You’ll notice a cloudy solution and perhaps even particles suspended in the water. That’s a good sign—it means the debris has been successfully removed.

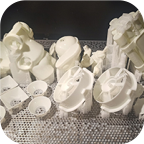
baskets
Post-Cleaning Protocol: Rinse, Dry, and Maintain
Once the cycle is done, resist the urge to touch the item directly. Use gloves or tweezers to remove it from the solution. Rinse thoroughly under clean water—especially if a chemical solution was used—and gently dry using a lint-free cloth or compressed air.
For objects with internal passages (like carburetors or nozzles), make sure there’s no residual moisture. A final air-dry or low-heat oven cycle can help if needed.
Afterward, clean the tank. Dispose of the used solution properly—many industrial and lab-grade cleaners contain substances that shouldn’t go down the drain. Wipe down the tank interior and lid to avoid buildup and extend the device’s life.
And yes, let your machine rest if you’ve run multiple cycles—it needs cooling down just like any other appliance.

Cleaning fluid
Tips, Mistakes to Avoid, and How to Know You’re Doing It Right
Don’t use flammable liquids like gasoline or alcohol in ultrasonic cleaners—they pose a real fire risk when cavitation energy is involved. Stick with aqueous-based or specially formulated ultrasonic solutions.
Never clean glued jewelry, soft gemstones (opal, turquoise), old watches, or wooden tools unless you’re absolutely sure they can withstand ultrasonic treatment.
How do you know it’s working? Look at the results: clearer glasses, sparkling rings, finely detailed metal parts restored without abrasion. But also, watch how quiet the machine sounds after degassing, how uniform the cavitation appears, and how evenly cleaned the items look. That’s your best feedback loop.
And remember: using a high-quality ultrasonic cleaner, like those from reputable manufacturers such as Granbosonic, ensures consistent performance and long-term reliability.
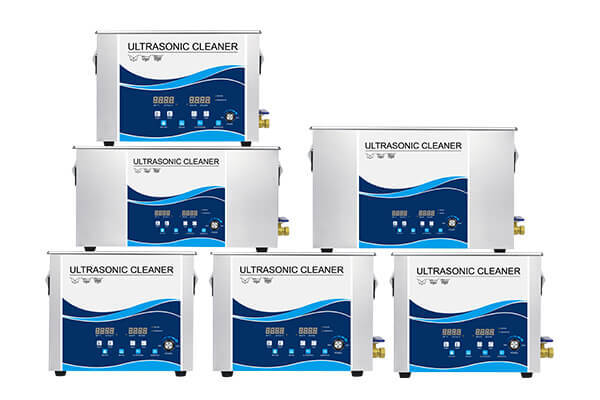
Granbo ultrasonic cleaners
Final Thoughts: Elevating Everyday Cleaning with Precision Sound
Using an ultrasonic cleaner is not just about efficiency—it’s about care, precision, and knowing when to trust the science. From the way you mix the solution to the way you handle your freshly cleaned items, each step plays into a wider dance of sound and substance. Whether you’re a hobbyist, a technician, or simply someone who loves their belongings looking their best, mastering this process can elevate how you think about cleanliness.