


Best Solutions to Use in an Ultrasonic Cleaner for Retainer Care
Browse Volume:217 Classify:Support
Keeping your retainer clean isn’t just about appearance—it’s about your oral health. When you wear a dental appliance every day, you’re not just trapping bacteria and plaque; you’re creating a micro-environment in your mouth that, if left unchecked, can lead to bad breath, tooth decay, gum inflammation, or even infections. That’s why a growing number of people are turning to ultrasonic cleaners as a more effective and convenient way to maintain their retainers.
Compared to traditional brushing or soaking, ultrasonic cleaning delivers microscopic, high-frequency energy that can access even the tightest spaces. But many users wonder: what exactly should you put in the ultrasonic cleaner when cleaning your retainer? The answer isn’t always as simple as water—and getting it right can make a big difference in hygiene, appliance longevity, and your overall comfort.
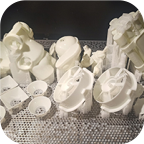
Braces
Why Proper Retainer Cleaning Matters
Every day your retainer collects bacteria, biofilm, and microscopic food particles—even if you rinse it regularly. If you’ve ever noticed a cloudy haze or tartar buildup along its edges, that’s a sign of bacterial accumulation that brushing alone might not solve.
Wearing a dirty retainer can reintroduce bacteria into your mouth after brushing your teeth, defeating the purpose of oral hygiene. The American Association of Orthodontists emphasizes the importance of daily cleaning to avoid microbial contamination and protect the integrity of dental devices.
This is where ultrasonic cleaning stands out. By using high-frequency sound waves in a liquid medium, it creates millions of microscopic bubbles that implode against the surface of your retainer. This process—known as cavitation—dislodges buildup without relying on harsh chemicals or abrasive brushing, reducing the risk of damage to sensitive materials.
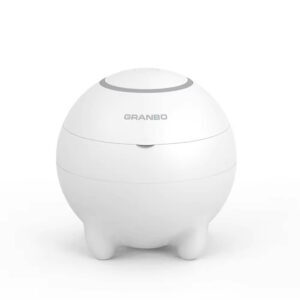
UV Ultrasonic Cleaner for Dental Appliances – 360° Deep Clean for Dentures, Jewelry & Household Items, 48kHz Frequency, 3 Modes
How Ultrasonic Cleaning Works for Retainers
Ultrasonic cleaners operate on frequencies typically ranging from 20kHz to 200kHz. For retainers, most devices designed for dental or personal use are set at 40kHz, striking the right balance between cleaning power and gentle action.
When you place your retainer into the tank and start the machine, sound waves travel through the cleaning solution and generate countless microscopic vacuum bubbles. As they collapse, they create tiny bursts of pressure that knock off dirt, protein film, and even hardened plaque—without scratching the surface.
This makes ultrasonic cleaning especially helpful for:
- Hawley retainers (with metal wires)
- Clear retainers (Essix or Vivera)
- Night guards and aligners
- Denture components
It’s worth noting that the cleaning process is hands-free, quick (typically 3 to 10 minutes), and capable of reaching places a toothbrush simply can’t. The result? A fresher retainer, improved oral health, and less manual scrubbing.
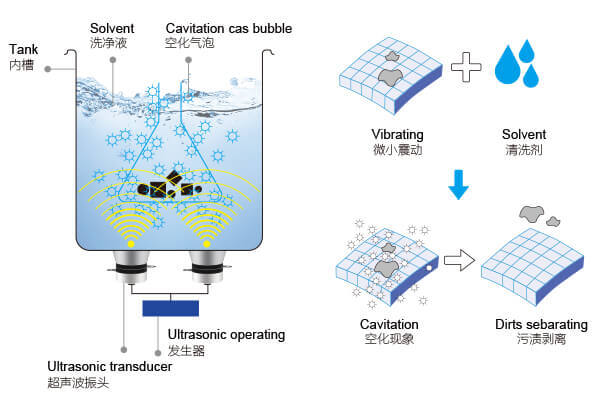
The Principle Behind Ultrasonic Cleaning
Can You Use Just Water in an Ultrasonic Cleaner?
It’s a common misconception that plain water is all you need in an ultrasonic cleaner. While water is necessary as the base medium—especially distilled water, which avoids mineral buildup—it doesn’t always deliver optimal results on its own.
Water alone works if you’re cleaning very frequently and only need to remove light debris. However, for anything more than daily grime, a cleaning additive is recommended. Without it, protein residues and bacterial film may remain, especially in hard-to-reach corners or textured areas of the retainer.
You also risk redepositing loosened particles if there’s no detergent action in the water. For this reason, ultrasonic solutions often include surfactants or enzymes that help break down organic matter and suspend debris in the liquid.
If you must use water only, it should be:
- Clean and distilled (not tap water)
- Heated to around 30°C to 40°C for better cavitation (if your device supports heating)
- Replaced after each use to avoid bacterial contamination
Still, even the best machines can’t clean well without the right solution. The next section will explain what you should put in your ultrasonic cleaner when cleaning retainers—and what you should avoid.
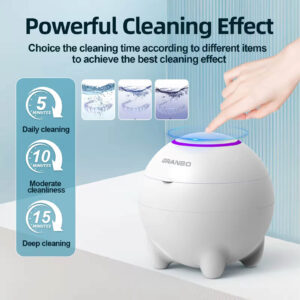
Powerful cleaning Effect
Choice the cleaning time according to different items
to achieve the best cleaning effect
Best Cleaning Solutions to Use in an Ultrasonic Cleaner for Retainers
Choosing the right cleaning solution is what makes ultrasonic cleaning so effective, especially for dental appliances like retainers. The right solution not only boosts cavitation but also breaks down biological debris, biofilm, and bacteria that plain water can’t touch.
So, what should you put in your ultrasonic cleaner when you’re cleaning a retainer? Here are the safest and most effective options, each with its own benefits depending on your hygiene goals and appliance type.
Enzymatic Cleaning Solutions
Enzymatic cleaners are among the most effective and dentist-recommended options for retainers. These solutions contain proteins that digest and break down organic matter—such as saliva proteins, food residues, and plaque—without damaging plastic or metal components.
Many dental offices use enzymatic cleaners for soaking dentures or surgical tools before sterilization, which speaks to their efficiency and safety. When used in an ultrasonic bath, these cleaners can deeply penetrate crevices and wire joints.
Brands like ZymeAway, Tartar & Plaque Remover, or Dental Ultrasonic Enzymatic Cleaner Concentrates are typically sold in liquid or powder form and diluted per label instructions. Just make sure the temperature does not exceed 40°C, as enzyme activity can degrade under heat.
Retainer Cleaning Tablets (e.g., Retainer Brite)
Many orthodontists recommend effervescent tablets like Retainer Brite, Polident for Dentures, or Steraligner for ultrasonic cleaning. These tablets are specifically designed to:
- Remove odors
- Kill bacteria
- Dissolve protein buildup
- Minimize discoloration
To use, simply drop one tablet into warm distilled water in your ultrasonic cleaner and allow it to dissolve. Run the cleaning cycle for 5 to 10 minutes. Most tablet-based cleaners are non-abrasive and safe for daily use.
Do note: Some tablets may include colorants or mild bleaching agents. Always check for compatibility with your specific retainer material.
Mild Dish Soap
For users who prefer a budget-friendly or natural approach, a small drop of mild, fragrance-free dish soap can be effective. Look for formulas that are free from dyes, perfumes, or acids.
Just a pea-sized drop in a tank of distilled water is sufficient. Agitate the water before starting the ultrasonic cycle to create a uniform solution. This works particularly well for everyday maintenance between deeper enzymatic cleanings.
Medical-Grade Cleaning Fluids
Some users prefer professional-grade cleaning concentrates, often labeled for dental or surgical use. These fluids are made to clean instruments like scalers, forceps, or surgical trays—so they’re generally effective and tested under strict conditions.
Always make sure the product is non-corrosive and safe for plastics if using with clear retainers like Essix or Vivera models. Some solutions may be too harsh and can cloud or warp delicate plastics if misused or overheated.
DIY Alternatives: Baking Soda or White Vinegar?
While DIY solutions are often cited online, they come with caveats. A baking soda and water mix can help reduce odors and soften debris, but it lacks the cleaning strength of commercial solutions. If used, always ensure the powder is fully dissolved and never scrub with it, as undissolved granules can scratch surfaces.
White vinegar, though mildly acidic, should be used with extreme caution or avoided altogether in ultrasonic units. It may etch plastics or react with metal wire components, especially with prolonged use.
What Not to Use in an Ultrasonic Cleaner with Retainers
While ultrasonic cleaners are incredibly effective, their power doesn’t give you a pass to use just any cleaning fluid. In fact, some substances can cause permanent damage to your retainer—or to the ultrasonic unit itself.
Here’s what to avoid:
Mouthwash
Mouthwash may seem like a hygienic option, but most contain alcohol or acidic ingredients that are far too aggressive for plastic retainers. These chemicals can cause warping, clouding, and even microcracks over time.
In an ultrasonic bath, heat and cavitation can accelerate these reactions, worsening the impact.
Hydrogen Peroxide
While peroxide is often used for surface disinfection, it’s too reactive for ultrasonic cleaning—especially when combined with heat. It may oxidize metal wires or alter the texture of clear retainers over time.
Some orthodontists allow brief peroxide soaks outside of ultrasonic use, but it’s not ideal for regular or deep cleaning.
Bleach or Ammonia-Based Cleaners
Never use bleach or ammonia in your ultrasonic cleaner. These substances are:
- Chemically aggressive
- Potentially corrosive to tank components
- Harmful if residual traces are left on retainers
Even diluted bleach can degrade the structural integrity of your retainer and cause serious irritation if not rinsed thoroughly.
Acidic Cleaners (e.g., Lemon Juice or Vinegar)
Although natural, acidic ingredients like lemon juice or vinegar can etch clear plastic retainers and degrade bonding in multi-material devices. They also leave behind strong odors and may react with metal solder joints.
Temperature and Time Settings for Ultrasonic Retainer Cleaning
Setting the correct temperature and cleaning time in your ultrasonic cleaner is essential for two reasons: achieving effective hygiene and protecting the material integrity of your retainer.
Retainers, particularly clear thermoplastics like Essix or Vivera, can deform when exposed to heat. Others, like Hawley retainers with acrylic and wire, are less heat-sensitive but still vulnerable to chemical interactions at high temperatures.
Ideal Temperature Range: 30°C to 40°C (86°F to 104°F)
This temperature window provides an optimal balance:
- Encourages efficient cavitation
- Activates most cleaning agents (especially enzymatic)
- Remains safe for plastics and adhesives used in retainers
According to dental cleaning protocols from industry manufacturers like Hu-Friedy and SciCan, enzymatic solutions commonly used for dental devices operate best below 45°C, with peak effectiveness at 37°C to 40°C.
When using an enzymatic cleaner in your ultrasonic bath, it’s critical not to exceed 40°C. Overheating can:
- Inactivate the enzymes in the cleaner
- Soften thermoformed materials
- Weaken metal-to-acrylic bonds
If your ultrasonic cleaner has a heating function, always monitor it during warm-up. Some models overshoot temperatures, especially if left running for extended cycles. Digital models with real-time temperature control are best.
Recommended Cleaning Time: 5 to 10 Minutes
A typical ultrasonic cycle for retainers should last 5 to 10 minutes, depending on the level of buildup:
- 5 minutes: for daily maintenance with light residue
- 7–10 minutes: for deeper cleaning or heavy plaque buildup
Running the unit for more than 15 minutes is unnecessary in most cases and could risk wear on fine features, especially on custom-fit retainers or devices with soldered joints.
Over-cleaning not only wastes energy—it could lead to micro-pitting or material fatigue if the cleaning solution is too strong or the cavitation too intense.
Some high-end ultrasonic units include pulse mode, degassing, or variable frequency sweep features. If yours has these, they can improve cleaning performance without requiring long runtimes. Always follow the manufacturer’s guidelines.
How to Prepare the Cleaning Solution and Operate the Ultrasonic Bath
Whether you’re using a basic 40kHz tabletop cleaner or a more advanced digital unit, proper setup ensures you get the most out of your ultrasonic cleaning routine. Here’s how to do it right—from preparing the solution to drying your retainer afterward.
Step 1: Add Distilled Water and Cleaning Agent
Fill the tank with distilled water, leaving enough room for the retainer and basket. Using tap water may leave mineral deposits or interfere with cleaning agent performance. Then, add your preferred cleaner:
- One enzymatic tablet or scoop of powder (per instructions)
- A few drops of liquid cleaner or dish soap
- Or a commercial concentrate diluted as labeled
Stir gently to mix, especially if the cleaner is granular or powdered.
Step 2: Degas the Solution (Optional but Helpful)
If your cleaner has a degas function, run it for 1–2 minutes before placing your retainer. This removes trapped air in the water that might reduce cavitation efficiency.
Even if your device lacks this function, running it briefly before insertion will improve cleaning by stabilizing the solution.
Step 3: Insert the Retainer
Place the retainer inside a mesh basket or holder, not directly on the bottom of the tank. Direct contact with the transducer plate may cause vibration damage over time.
Ensure the retainer is fully submerged but not pressed against the tank sides.
Step 4: Start the Cleaning Cycle
Set the timer (5 to 10 minutes) and temperature (30°C to 40°C). Let the ultrasonic action work—there’s no need to stir or adjust during the cycle.
You may notice cloudiness or particles appearing in the water. That’s residue and protein being lifted from the retainer’s surface.
Step 5: Rinse and Dry Thoroughly
Once finished, remove the retainer using clean hands or sanitized tongs. Rinse it under cool running water to remove any leftover cleaning agent. Dry it with a lint-free cloth or air dry before wearing or storing it.
Always discard and replace the cleaning solution after each use, especially if it appears cloudy or has visible debris.
How Often Should You Clean Your Retainer with an Ultrasonic Cleaner?
Regularity is everything when it comes to retainer hygiene. Unlike brushing your teeth, which removes surface-level plaque, retainers require a more specialized approach to remove embedded bacteria and biofilm. Ultrasonic cleaners make this process easier, which begs the question—how often should you use one?
Daily vs. Weekly Cleaning
For most people wearing retainers every day (especially overnight), daily rinsing and brushing with a soft toothbrush is essential. However, that only handles visible buildup and leaves behind microscopic contaminants that eventually calcify.
Using an ultrasonic cleaner two to three times per week is ideal for general users. This frequency helps:
- Prevent hard tartar deposits from forming
- Remove deeper bacterial colonies
- Reduce discoloration and odor
If you’re prone to excessive plaque buildup or suffer from halitosis, daily ultrasonic cleaning may be beneficial. In these cases, always use a gentle, non-aggressive cleaning solution and avoid overexposure.
For individuals using clear aligners (like Invisalign), which are swapped frequently, a once-a-day ultrasonic clean is appropriate, especially for aligners that are worn for 22 hours daily and accumulate bacteria rapidly.
According to the Journal of Clinical Orthodontics, microbial contamination can occur in as little as 12 hours on intraoral appliances, reinforcing the value of frequent deep cleaning .
Is Ultrasonic Cleaning Safe for All Types of Retainers?
Ultrasonic cleaning is compatible with nearly all modern retainer types—but some materials require special attention. Let’s break it down.
Safe to Use With:
- Hawley Retainers
Made from acrylic and stainless-steel wire, Hawleys are generally sturdy and respond well to ultrasonic cleaning. Use mild enzymatic or detergent-based solutions, and avoid acidic agents which could corrode the metal. - Essix and Vivera Clear Retainers
These thermoformed plastic retainers benefit greatly from ultrasonic cleaning due to their smooth, enclosed surfaces that trap bacteria. Ensure the cleaning temperature stays below 40°C to avoid warping. - Night Guards and Occlusal Splints
Made of rigid or soft acrylic, these are also suitable for ultrasonic cleaning. As with others, avoid solvents, alcohol-based cleaners, or bleach solutions. - Aligners (Invisalign, SmileDirectClub)
Safe for ultrasonic use when cleaned with diluted dish soap or specific cleaning tablets. Avoid extended cleaning cycles to prevent microcracking of the plastic.
Use With Caution:
- Retainers with Embedded Electronics
Any device with a built-in sensor (like a smart night guard or retainer tracker) should not be placed in an ultrasonic cleaner. The vibrations and moisture can damage circuits. - Retainers with Loose Joints or Cracks
Ultrasonic cavitation can exacerbate structural weaknesses. If your retainer has visible cracks, solder splits, or missing wire segments, repair or replacement is necessary before cleaning. - Heat-Sensitive Components
If your retainer was fabricated with heat-sensitive adhesives or printed components, consult your orthodontist before ultrasonic use.
A safe general rule: If in doubt, test with a short cycle using water only, then inspect for warping, discoloration, or surface changes before proceeding with a full cleaning protocol.
When Should You Avoid Ultrasonic Cleaning for Retainers?
Ultrasonic cleaners are powerful tools—but they’re not always the right choice. Here are circumstances where you should avoid or pause ultrasonic use:
- If You’re Using DIY Cleaning Solutions with Unknown Ingredients
Avoid using hydrogen peroxide, vinegar, baking soda, or essential oils. While common in household cleaning, these ingredients can damage retainers in the ultrasonic environment, especially when heated. - Immediately After Adjustments
If your orthodontist has just modified your retainer, wait 24–48 hours before ultrasonic cleaning to ensure adhesives or structural changes have set properly. - During Professional Treatment Monitoring
If your orthodontist is monitoring wear or staining patterns for treatment progress, ultrasonic cleaning may interfere with visible cues. In such cases, check before use. - When Electricity or Water Safety Is in Question
Never use the unit near water sources or while plugged into unstable outlets. For battery-powered models, ensure the unit is fully charged and sealed before starting a cycle.
Remember, ultrasonic cleaning supplements—not replaces—manual care and regular inspections. If your retainer is damaged, uncomfortable, or seems misaligned, prioritize professional evaluation over additional cleaning.
Best Practices for Daily and Weekly Retainer Cleaning Schedules
Combining ultrasonic cleaning with a consistent manual cleaning routine will significantly extend the lifespan of your retainer and ensure better oral health. Here’s how to balance both.
Daily Routine
Every day, when you remove your retainer—whether in the morning or before meals—rinse it under lukewarm water. This helps flush away saliva and loose debris. Then, gently brush it with a soft-bristled toothbrush (not the same one you use for your teeth) and a dab of mild liquid soap or retainer-specific cleanser.
Avoid using:
- Toothpaste, which contains abrasives that can scratch plastic retainers.
- Hot water, which may deform thermoplastics.
- Alcohol-based mouthwash, which can dry or degrade acrylic and plastics.
Let the retainer air dry in a clean container with good ventilation. Closed containers without airflow can encourage bacterial growth.
Weekly Routine (or 2–3 Times per Week)
On top of your daily maintenance, perform an ultrasonic cleaning 2–3 times per week. This routine ensures deep cleaning of biofilm, invisible plaque, and microbial buildup.
Pro tip: Pick two fixed days per week—like Wednesday and Sunday—to make ultrasonic cleaning part of your hygiene habit.
Regular inspections are also useful. Look for signs like:
- Cloudiness or yellowing
- Bad odor
- Visible debris in crevices
- Tightness or looseness when wearing
These signs often signal the need for deeper cleaning—or, if persistent, replacement.
Choosing the Right Ultrasonic Cleaner for Retainers
Not all ultrasonic cleaners are created equal. When choosing a unit specifically for retainer cleaning, you’ll want to prioritize ease of use, safety features, and compatibility with dental devices.
Here’s what to consider:
Frequency
A frequency of 40kHz is ideal for retainers. It offers a balance between cleaning power and safety for plastics and acrylics. Higher frequencies (68kHz and above) are gentler but may be unnecessary unless you’re also cleaning jewelry, lenses, or highly sensitive items.
Avoid low-frequency units (25–28kHz) meant for industrial or mechanical parts, as they may be too aggressive for delicate dental appliances.
Tank Size and Build
For retainers, a 600ml to 1200ml tank is usually sufficient. Make sure the cleaner includes:
- A removable basket to protect the retainer from direct contact with the tank bottom
- Stainless steel interior, which is easier to clean and more durable
- A lid to prevent splash and retain heat
Some advanced models also offer touch panels, digital timers, or memory settings—useful if you clean multiple items or have more than one retainer in your household.
Heating Function (Optional but Controlled)
Units with adjustable temperature controls are excellent for enzymatic cleaning. Just ensure:
- The heating element is stable and accurate
- You can keep temperatures below 40°C
- There’s an automatic shutoff or timer to avoid overheating
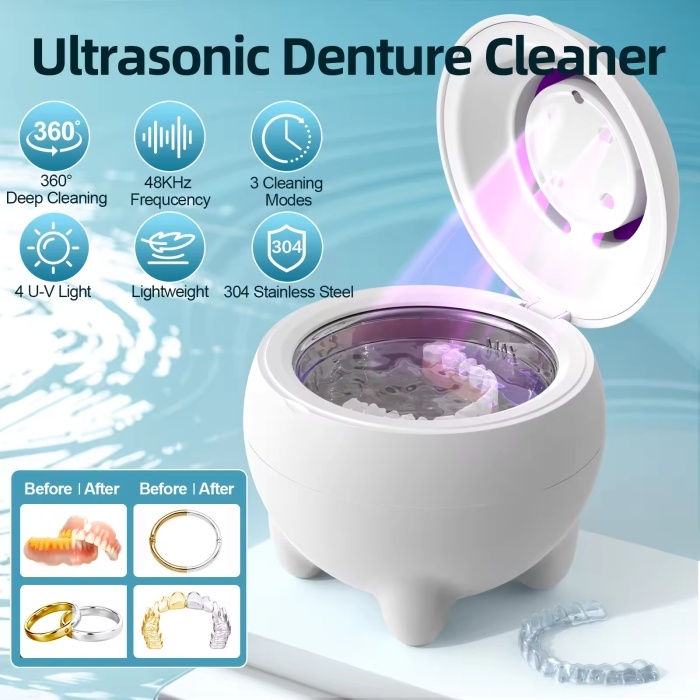
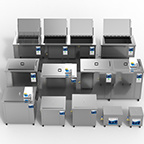
Ultrasonic Denture cleaner
What Dental Professionals Say About Ultrasonic Cleaning
Dental hygienists and orthodontists increasingly recommend ultrasonic cleaning for retainers, especially for patients who struggle with plaque control or those wearing retainers long-term.
According to the American Association of Orthodontists (AAO), retainers are most susceptible to bacterial colonization, especially when worn overnight. Regular cleaning, including ultrasonic use, significantly reduces the risk of oral infections, bad breath, and bacterial reinfection post-treatment .
A 2022 study published in the International Journal of Dental Hygiene concluded that ultrasonic cleaning reduced Streptococcus mutans and Candida albicans colonies on acrylic-based retainers more effectively than brushing alone.
However, professionals do stress the importance of:
- Using non-corrosive, biocompatible cleaning agents
- Avoiding overuse of high temperatures
- Replacing the retainer when signs of degradation appear
Most orthodontists recommend combining ultrasonic cleaning with quarterly dental checkups, especially for patients in long-term retention or those with night guards.
Frequently Asked Questions: Ultrasonic Cleaning and Retainers
Can I use denture tablets in an ultrasonic cleaner with my retainer?
Yes—most denture tablets are safe when used occasionally with retainers in an ultrasonic cleaner. However, always check that the tablet does not contain bleach or oxidizing agents that could degrade plastic. For routine use, enzymatic tablets made specifically for orthodontic appliances are preferred.
Is ultrasonic cleaning better than brushing?
Ultrasonic cleaning is not a replacement for manual brushing but serves as an excellent supplement. It reaches microscopic crevices and removes bacteria that brushing cannot, especially in clear retainers or those with wire components.
Can I clean my retainer while it’s inside its plastic storage case?
No. Retainers should be removed from any storage container before ultrasonic cleaning. The case can be cleaned separately, ideally once per week in the same ultrasonic bath.
Can ultrasonic cleaning damage my retainer over time?
Not when used correctly. Excessive heat, harsh chemicals, or prolonged cleaning times may degrade plastics or adhesives, but following manufacturer and dental guidelines prevents damage.
How long does a typical ultrasonic cleaning cycle take?
Most retainer-cleaning cycles last between 3 to 10 minutes, depending on the solution used. Follow the instructions provided with your unit and avoid unnecessary long cycles.
Is there a difference between ultrasonic cleaners for jewelry and those for dental items?
Functionally, many are the same, especially if operating at 40kHz. However, dental-specific models may include features like antimicrobial coatings, finer baskets, or gentler settings tailored to orthodontic appliances.
Final Thoughts on Best Practices and Safe Cleaning
Using an ultrasonic cleaner for your retainer can elevate your hygiene game—if done correctly. From choosing the right solution to setting safe temperatures and timing, each step matters in ensuring not just cleanliness, but the longevity and integrity of your dental appliance.
Rather than relying on random home remedies or skipping deep cleans, ultrasonic cleaners offer a reliable, science-backed method to protect your investment and your health. Whether you wear your retainer at night or full-time, integrating ultrasonic cleaning into your routine will save you future dental costs and maintain oral freshness with ease.
If you’re unsure which solution or device best fits your needs, consult your orthodontist. They can help align your cleaning routine with your treatment goals and the material makeup of your specific retainer.