


Ultrasonic Cleaning for Retainers: Safe, Effective, and Worth It?
Browse Volume:211 Classify:Support
After months or even years of wearing braces, retainers are often the final step in an orthodontic journey. They hold your teeth in position and protect the hard-earned results of orthodontic treatment. But despite their importance, retainers are frequently overlooked when it comes to daily hygiene.
Unlike teeth, retainers don’t have a built-in cleaning mechanism. They’re constantly exposed to saliva, food debris, and the millions of bacteria that naturally live in your mouth. And while they may appear clean on the surface, microstructures in plastic or acrylic retainers can harbor invisible layers of biofilm and tartar. The result? Discoloration, unpleasant odor, and even an increased risk of oral infections.
It doesn’t take long for a retainer to lose its clarity or freshness. A few days of wear without cleaning can leave clear retainers looking yellow and feeling sticky. Worse, bacteria such as Streptococcus mutans or Candida albicans—common culprits behind cavities and fungal infections—can build up on improperly cleaned appliances. This is more than a cosmetic issue. Long-term exposure to such pathogens may lead to bad breath, sore gums, or recurring irritation inside the mouth.
Orthodontists routinely stress the importance of cleaning retainers daily. Yet many patients find the traditional methods lacking—slow, awkward, or just not very effective. That’s where ultrasonic cleaners come into the conversation: not as a replacement for basic hygiene, but as a technological upgrade.
The Struggle of Cleaning Retainers the Old-Fashioned Way
If you’ve ever tried scrubbing a retainer with a toothbrush, you know the frustration. The edges are too narrow, the grooves are hard to reach, and the results are usually underwhelming. You can brush and soak all you want—plaque buildup and cloudy residue seem to come back faster than you’d expect.
Mouthwash soaks? Too harsh for daily use. Vinegar and baking soda? Effective to a point, but they don’t penetrate the microscopic spaces where biofilm truly hides. Commercial effervescent tablets help with surface stains but often leave behind a chalky film and don’t fully remove bacteria.
Worse still, many people don’t clean their retainers at all. Or if they do, they rinse it quickly under water and call it a day. Over time, this leads to significant bacterial accumulation. Studies have shown that even visibly clean-looking retainers can host millions of colony-forming units per square centimeter if not properly disinfected.
Let’s face it—traditional cleaning methods are better than nothing, but they aren’t ideal. Especially not for something that sits inside your mouth for 8 to 20 hours a day.
That’s what makes ultrasonic cleaning so compelling. It promises thorough cleanliness with minimal effort—and for a growing number of retainer users, it delivers.
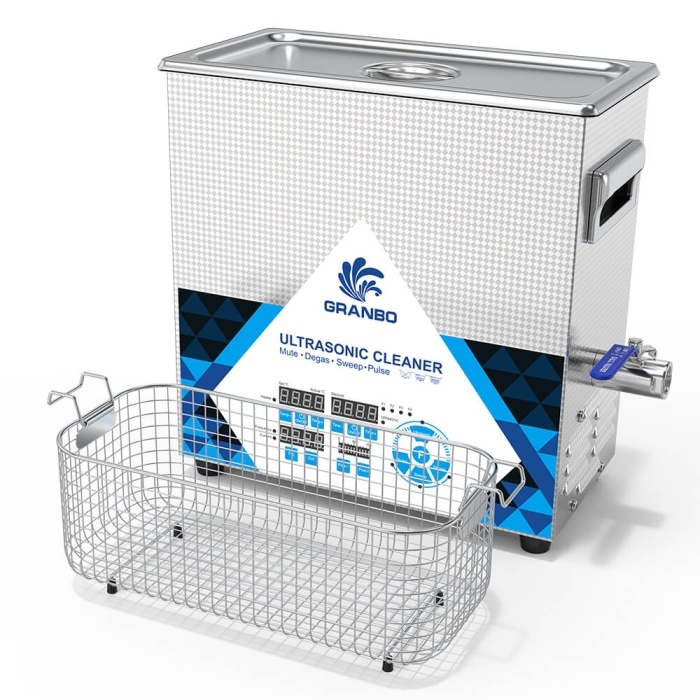
What Is an Ultrasonic Cleaner?
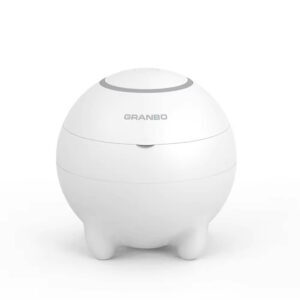
UV Ultrasonic Cleaner for Dental Appliances – 360° Deep Clean for Dentures, Jewelry & Household Items, 48kHz Frequency, 3 Modes
At first glance, an ultrasonic cleaner might look like a small countertop appliance with a digital timer and a metal tank. But what it does is far more interesting than its appearance suggests.
Ultrasonic cleaners use high-frequency sound waves—typically between 20khz and 200kHz—to create microscopic bubbles in a cleaning solution. These bubbles form and collapse rapidly in a process known as cavitation. When they burst near the surface of an object, they dislodge particles of grime, oil, and bacteria—even in places that are completely unreachable by brushes or wipes.
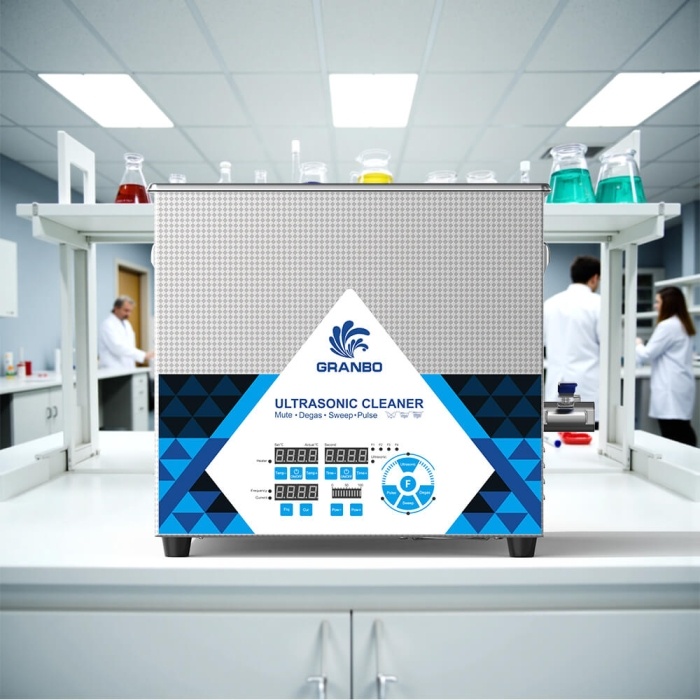
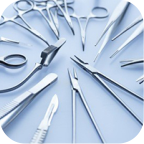
The technology is widely used in medical and dental fields. Dentists use ultrasonic baths to clean surgical instruments, polishers, and dental tools with intricate geometries. Jewelry professionals use them to restore sparkle to precious metals. Laboratory technicians use them to remove contaminants from glassware. And now, more and more orthodontic patients and parents are using ultrasonic cleaners to deep-clean retainers, aligners, and mouthguards at home.
It’s not just effective—it’s also efficient. Most ultrasonic cleaning cycles take just 3 to 5 minutes. There’s no scrubbing, no scratching, and no elbow grease. And the results are typically far better than what you’d get with manual cleaning alone.
The key to success? Understanding how and when to use ultrasonic cleaners correctly—especially with something as intimate as a retainer.
Can You Put a Retainer in an Ultrasonic Cleaner?
In short: yes, you can—with a few caveats.
Most modern retainers, especially those made from acrylic or thermoplastic (like Essix and Vivera), are safe to clean in ultrasonic units. Hawley retainers, which combine plastic bases with stainless steel wires, also tolerate ultrasonic cleaning well when handled properly. These materials are sturdy enough to endure gentle cavitation, and the benefits are undeniable: better hygiene, clearer appearance, and reduced risk of odor-causing bacteria.
However, ultrasonic cleaning is not a one-size-fits-all solution. The material and condition of the retainer matter.
For example, bonded retainers—those thin wires that are glued to the back of your teeth—should never be placed in an ultrasonic cleaner while still attached in your mouth. Not only is this unsafe, but the cleaning unit is not designed for in-situ use. If the bonded wire has been removed and you’re cleaning it separately, check whether it contains adhesives or composite materials that could degrade under ultrasonic stress.
Also, retainers that are cracked, warped, or over a year old may become brittle. While ultrasonic waves are gentle, repeated exposure on weakened plastic could accelerate damage. In those cases, manual cleaning is safer, or it may be time to get a replacement altogether.
And one final but important point: check with your orthodontist. Some clinics provide custom retainers with coatings or finishes that could respond differently to ultrasonic vibration. When in doubt, professional guidance trumps general advice.
Introduction to Cleaning Transparent Retainers in Small Ultrasonic Cleaners
The Science Behind It: Why Ultrasonic Cleaning Works on Retainers
Let’s take a moment to understand why ultrasonic cleaning is so effective—not just intuitively, but scientifically. After all, we’re talking about microscopic bacteria, biofilm layers, and complex retainer geometries. This isn’t just about scrubbing a plastic surface; it’s about disrupting microbial colonies at the root.
At the heart of ultrasonic cleaning is a phenomenon called cavitation. When high-frequency sound waves are transmitted through liquid, they create tiny vacuum bubbles. These bubbles collapse with force, generating microbursts of energy. When these bursts happen near a surface—like your retainer—they create localized pressure waves that knock loose anything clinging to it: bacteria, plaque, food particles, oils, even tiny mineral deposits.
Why does this matter for retainers? Because they are notoriously difficult to clean thoroughly. The surface of clear plastic retainers may look smooth to the naked eye, but under a microscope, they’re full of tiny pits, ridges, and micro-scratches. These microstructures provide the perfect hiding places for bacteria and fungi to grow. Cavitation bubbles can reach these crevices in a way toothbrush bristles simply can’t.
More importantly, studies show ultrasonic cleaning can significantly reduce bacterial load. In a study published by the Journal of Orthodontic Science, researchers found that ultrasonic cleaners reduced microbial presence on retainers by up to 99% when compared to water rinsing and manual brushing alone. Another investigation in the International Journal of Dental Hygiene highlighted ultrasonic cleaning as particularly effective in removing biofilm on removable dental appliances
It’s not magic—it’s science. And when combined with a compatible cleaning solution, ultrasonic devices can sanitize as well as clean. That’s a big deal for people who wear their retainers for 8–12 hours per day.
How to Clean Your Retainer with an Ultrasonic Cleaner (The Right Way)
If you’re sold on the idea and ready to try ultrasonic cleaning for your retainer, it’s crucial to do it properly. While the machines are relatively simple to operate, a few small tweaks in your method can make a big difference in both effectiveness and safety.
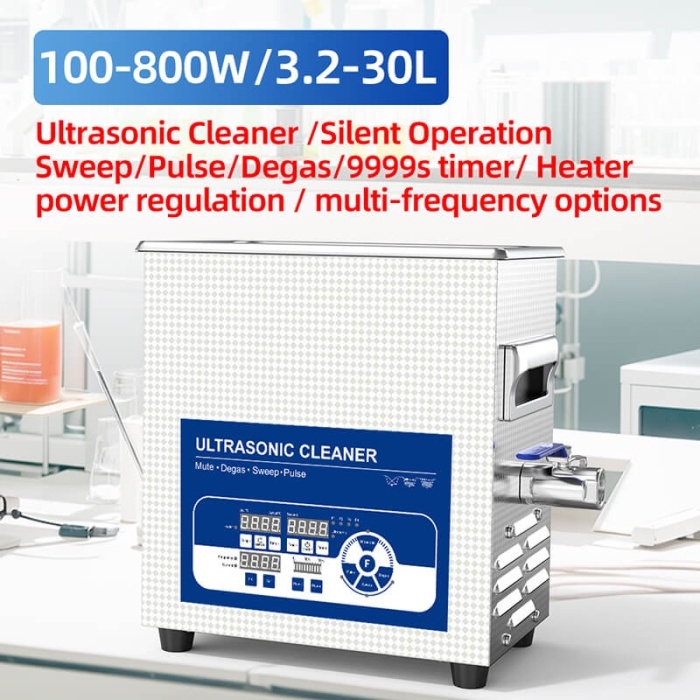
Start with the right equipment. Not all ultrasonic cleaners are created equal. For retainers, a compact home model with a frequency range between 40–45 kHz is ideal. These produce gentler cavitation waves, perfect for cleaning plastics and acrylics without stressing them. Lower-frequency models (like 28 kHz) tend to create more aggressive bubbles, which are better suited for metals or industrial use—and not delicate dental appliances.
Prepare your retainer. Rinse it under warm water to remove any visible debris. This step prevents large particles from floating into the ultrasonic cleaner’s transducer or scratching the surface during cavitation. Make sure the retainer isn’t cracked or damaged before cleaning—vibration can aggravate existing weaknesses.
Choose the right cleaning solution. Don’t just use water. A mild, non-foaming ultrasonic cleaning solution or a retainer-safe cleansing tablet (like those designed for aligners) is ideal. Avoid harsh chemicals like bleach, hydrogen peroxide, vinegar, or alcohol. These can dry out the plastic, degrade wires, or leave a chemical residue.
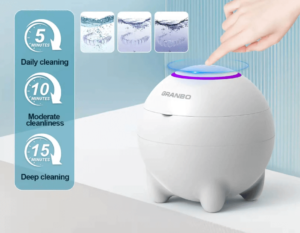
Set the cleaning parameters.
- Duration: 3 to 5 minutes is usually enough.
- Temperature: If your device has a heater, keep it under 40°C (104°F). Higher temperatures may deform plastic or warp the appliance.
- Basket: Always place the retainer inside the provided basket or tray—never directly on the bottom of the metal tank, which can damage both the retainer and the device.
Once the cycle is done, remove the retainer and rinse it under clean water. Let it air dry on a clean towel or retainer case. Avoid wiping with a rough towel or using heat to dry it.
You’ll notice the difference immediately: the retainer feels cleaner, smells fresher, and often looks clearer, especially for transparent aligners or Essix-style retainers. If used 2–3 times a week alongside daily brushing and rinsing, ultrasonic cleaning can extend your appliance’s lifespan and improve your overall oral hygiene.
Mistakes to Avoid When Using an Ultrasonic Cleaner
While ultrasonic cleaners are incredibly effective, they’re not foolproof. Misuse—however unintentional—can lead to damage, reduced retainer lifespan, or hygiene issues that defeat the purpose altogether. Understanding what not to do is just as important as following the correct steps.
One of the most common mistakes is overheating. Some people assume that warmer water must clean better, just like hot water helps dissolve grease. But retainers aren’t dinner plates. Excessive heat, especially above 45°C (113°F), can warp the plastic in clear aligners or cause small deformations in Hawley retainer bases. Even worse, heating some retainer materials repeatedly—even at moderate levels—can cause them to become brittle over time.
Another major mistake is the use of inappropriate cleaning chemicals. Products like bleach, hydrogen peroxide, alcohol, vinegar, or even heavily scented dish soaps may seem like logical choices, but they can be corrosive to both the retainer and the ultrasonic device. Bleach may yellow the plastic or erode the surface; vinegar can react with metals, and alcohol can dry out acrylics, leading to microcracks. These agents also tend to leave behind harsh odors and residues that you definitely don’t want in your mouth.
Prolonged cleaning cycles are also unnecessary. Some people run their ultrasonic cleaner for 10 or even 15 minutes, thinking longer equals better. Not true. Most retainers only need 3–5 minutes for optimal results. Longer cycles don’t dramatically improve cleanliness—but they can accelerate wear and tear on delicate parts like solder joints or metal wires.
Placement errors are also surprisingly common. Never place your retainer directly on the bottom of the tank. Doing so risks damaging both the ultrasonic transducer and the retainer itself. Always use the included basket or tray. And avoid stacking multiple items inside the cleaner—crowding reduces cleaning efficiency and increases the chance of abrasion.
Lastly, there’s the mistake of neglecting to clean the cleaner. Yes, your ultrasonic device needs cleaning too. Bacteria, soap scum, and debris can accumulate in the tank, affecting performance over time. Rinse and wipe it regularly, especially if you use it for dental appliances.
In the end, ultrasonic cleaners are only as good as the care you take using them. When treated as a precision hygiene tool—not a catch-all machine—they deliver impressive results without compromise.
When You Should Not Use Ultrasonic Cleaning for Retainers
Despite their many advantages, ultrasonic cleaners are not always the best choice. Certain conditions, materials, and clinical recommendations make manual cleaning a better—or even the only—option.
Let’s begin with the state of your retainer. If it’s old, cracked, or visibly worn, ultrasonic cleaning could do more harm than good. The micro-vibrations, while gentle, can exploit existing weaknesses. That small crack you’ve been ignoring? Cavitation might push it further. For retainers nearing the end of their lifecycle, stick to brushing and consider getting a replacement instead.
Next, consider permanent retainers, especially bonded lingual wires still attached to your teeth. These are designed to stay in place indefinitely and are not removable without a professional. Attempting to use an ultrasonic cleaner on them—while they’re still in your mouth—is extremely dangerous and completely inadvisable. Not only does it risk damage to your teeth and gums, but ultrasonic devices are not designed for intraoral use. If you’re concerned about plaque buildup on a permanent retainer, your dentist or hygienist can clean it using specialized instruments.
Another no-go scenario? If your orthodontist or dentist specifically advised against ultrasonic cleaning. Some dental appliances come with unique coatings or materials that don’t play well with cavitation. For example, custom-colored retainers or those with embedded designs may fade or peel under ultrasonic vibration. Trust professional advice over internet generalizations—always.
You should also skip ultrasonic cleaning if your retainer has any glued attachments, small moving parts, or metal elements soldered to acrylic. In some cases, ultrasonic waves can weaken or loosen these connections. The same applies to retainers with embedded sensors, chips, or RFID tracking tags (now sometimes used in orthodontics)—ultrasonic waves may interfere with or disable these features.
Lastly, children’s retainers often require more caution. Their appliances may be more delicate or made with different materials. For younger users or for appliances not designed with ultrasonic cleaning in mind, stick with daily rinsing and gentle brushing unless explicitly approved by a dental provider.
In all these cases, ultrasonic cleaning isn’t “bad” technology—it’s just the wrong application. Just as you wouldn’t machine wash a silk scarf, some retainers need a gentler touch.
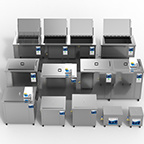
Professional vs. Home Use: Do You Need a Dental-Grade Unit?
It’s a fair question. If ultrasonic cleaners are used in dental clinics, should you invest in a professional-grade model for home use? Or will a consumer-level unit do the job?
The short answer: for most people, a home-use ultrasonic cleaner is more than sufficient. The machines found in dental offices are powerful, durable, and often built to handle frequent, high-volume sterilization of tools—not daily cleaning of a single plastic retainer. Their precision and capacity are ideal for professional environments, but they’re overkill (and overpriced) for personal use.
What you want for home care is a compact, user-friendly ultrasonic unit that operates in the 40–45 kHz range, which is gentler and safer for delicate plastics and wires. These frequencies create smaller cavitation bubbles, which clean effectively without stressing thin materials. Many high-quality home models even include digital timers, temperature controls, and cleaning presets for dental appliances.
If you’re in the market, here’s what you should look for:
- Tank size large enough to fit your retainer without crowding
- Detachable basket or tray to suspend the appliance above the metal bottom
- Adjustable timer for 2–10 minute cycles
- Optional heater, but ideally with the ability to turn it off
- Brand reputation and FDA/CE certification, especially for anything used orally
Units designed specifically for dental use—marketed for cleaning aligners, dentures, or mouthguards—are often bundled with safe cleaning tablets and instructions tailored to those devices. These are great options for first-time users.
That said, a professional unit can be useful for families with multiple retainers, aligners, or even hearing aids and jewelry to clean regularly. In such cases, the extra capacity and durability might be worth the investment.
But for the average person with a single retainer? You don’t need a $500 machine. A good $50–$100 consumer model, used correctly, can deliver dental-office-grade results at home—just on a smaller scale.

Compact and Portable
Design for Home and Outing
Additional Retainer Care Tips for Longevity and Hygiene
Using an ultrasonic cleaner is a huge step up from brushing alone, but it’s only one part of a good retainer care routine. To really protect your oral health and prolong your retainer’s lifespan, you’ll want to build a few other habits into your daily and weekly schedule.
First, rinse your retainer every time you remove it. This may seem trivial, but rinsing immediately after wear helps flush away saliva and food particles before they dry and harden. Even if you plan to clean it later with an ultrasonic cleaner, a quick rinse can prevent surface buildup and bacterial growth.
Second, don’t neglect daily brushing. A soft toothbrush—not the same one you use for your teeth—can help dislodge debris from the surface and grooves. Use only warm water or a non-abrasive cleanser. Never use toothpaste on your retainer—it’s too abrasive and can scratch the surface, making it more prone to staining and bacterial buildup.
Storage matters, too. Always keep your retainer in a well-ventilated case when it’s not in use. A sealed container without airflow can promote bacterial growth, while leaving it in the open invites contamination and warping from exposure to sunlight or heat.
Avoid soaking your retainer in boiling water, dishwashers, or microwave sterilizers unless it’s explicitly designed to withstand those methods. High temperatures can permanently distort the shape of your appliance, rendering it useless. The same goes for UV sanitizers—they’re trendy, but not all retainers are compatible with ultraviolet treatment. If you do use one, make sure your retainer manufacturer supports it.
Finally, make your orthodontic checkups count. Bring your retainer to appointments and ask for a professional cleaning or inspection. Dentists and orthodontists can check for stress cracks, plaque buildup, or improper fit that you might not notice on your own.
Good retainer hygiene isn’t just about keeping your appliance clean—it’s about maintaining your dental investment and keeping your mouth healthy and comfortable. When paired with ultrasonic cleaning, these small habits form a care routine that’s simple, sustainable, and effective.
Real User Experiences: What People Say About Ultrasonic Cleaning
Talk to anyone who’s used an ultrasonic cleaner for their retainer, and you’ll hear the same sentiment repeated over and over: “Why didn’t I do this sooner?” The technology might seem like a professional-grade luxury at first, but once users try it, most find it hard to go back.
Take James, a college student who wears an Essix retainer every night. After months of brushing it with dish soap and a toothbrush, he still found it cloudy and slightly smelly in the morning. He finally purchased a $60 ultrasonic cleaner online and began using it every few days. “The first time I used it,” he said, “I saw actual debris floating in the water—even though I’d just brushed the retainer beforehand. That was enough to convince me.”
Then there’s Monica, a mother of two teenagers with clear aligners. She was spending over $40 a month on name-brand cleaning tablets and still felt uncertain about whether their retainers were really clean. A friend recommended an ultrasonic cleaner marketed for dental appliances, and within a week, she noticed her kids weren’t complaining about bad smells or cloudy plastic. “They actually wanted to use it,” she said. “It became part of their routine.”
Professional feedback echoes this shift. Dr. Laura Mendes, a practicing orthodontist in Austin, notes that patients who use ultrasonic cleaners “generally present with better oral hygiene and retainers that last longer. It’s not required, but it’s one of the best optional upgrades I recommend.”
Of course, not every experience is perfect. A few users admit they damaged their retainers by running the cleaner for too long or using harsh solutions like vinegar or mouthwash. Others mistakenly tried to clean glued-in retainers, only to learn—sometimes the hard way—that ultrasonic cleaning is for removable appliances only.
But overwhelmingly, the consensus is positive. Cleaner retainers, fresher breath, fewer stains, and a boost in confidence are commonly reported. What begins as a techy novelty quickly becomes a staple of dental care for people who try it.
Is It Worth Buying an Ultrasonic Cleaner Just for a Retainer?
If you’re still on the fence, this is the core question, isn’t it? Does a single retainer justify the purchase of a dedicated cleaning device?
Let’s break it down.
Consider the cost: a quality ultrasonic cleaner designed for dental use typically ranges between $40 and $120. That’s about the price of two or three sets of premium cleaning tablets—or less than one replacement retainer, which can cost $150 to $300 depending on the provider.
Now weigh that against the benefits:
- Deep cleaning that’s significantly more effective than brushing or soaking
- Better breath, cleaner taste, less plaque on your retainer and in your mouth
- Fewer retainer replacements due to discoloration, brittleness, or odor buildup
- Ability to clean other household items—eyeglasses, rings, watches, razors, earrings, and even Invisalign or night guards
If you wear your retainer daily, or even a few nights a week, the math quickly adds up. And if more than one person in your household uses orthodontic appliances, the value multiplies. What starts as a hygiene solution for one person often turns into a shared tool for the whole family.
It’s not just about cleaning—it’s about protecting your orthodontic investment. Braces and aligners cost thousands of dollars. Your retainer is what keeps your teeth in place after all that effort. Keeping it clean isn’t just a matter of comfort; it’s a matter of long-term dental health.
So is it worth it?
For most people, especially anyone who’s serious about oral hygiene, the answer is a confident yes.
Final Thoughts: Your Retainer Deserves Better Than a Toothbrush
Think about it: your retainer lives in one of the most bacteria-prone environments in your body. It rests against your teeth and gums for hours every day, absorbing everything from microscopic food particles to invisible film from saliva.
You wouldn’t wear the same contact lenses for a week without cleaning them. You wouldn’t drink from the same water bottle without washing it. So why treat your retainer any differently?
Ultrasonic cleaners are not gimmicks. They’re tested, trusted, and backed by research from dental and medical professionals alike. They reach where bristles can’t, remove what rinsing leaves behind, and extend the life of one of the most essential tools in your post-orthodontic care.
Use them wisely, not recklessly. Don’t throw your retainer into an overheated industrial bath and expect magic. Respect the limits, follow best practices, and consult your dentist if unsure. But don’t be afraid to embrace the upgrade.
Because honestly, your retainer—and your smile—deserve it.
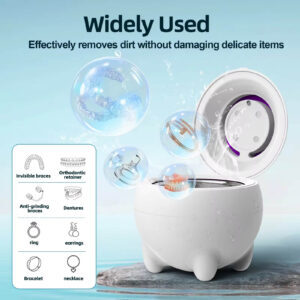
Widely Used
Effectively removes dirt without damaging delicate items