


Using Ultrasonic Cleaners for Dental Tools and Devices
Browse Volume:97 Classify:Support
When it comes to oral hygiene, most people think of brushing, flossing, and rinsing. But what about the tools that support those routines—retainers, dentures, aligners, mouthguards, or dental instruments? These items spend hours inside your mouth or are used directly on patients in clinical settings. They’re exposed to saliva, bacteria, food particles, blood, and biofilm. And unlike teeth, they can’t self-clean.
At home, it’s tempting to rinse a retainer under warm water or scrub a mouthguard with a toothbrush. While this removes visible debris, it doesn’t address the microbial colonies that quickly build up in grooves, hinges, or porous surfaces. In clinical settings, where the stakes are higher, bloodborne pathogens, protein residues, and other contaminants can remain even after pre-cleaning.
A study published in the Journal of Prosthetic Dentistry found that improperly cleaned dentures could harbor Candida albicans, Staphylococcus aureus, and other pathogens that are resistant to rinsing or surface wiping. Another paper in the Journal of Dental Hygiene demonstrated that orthodontic retainers could contain biofilm that requires mechanical agitation to fully remove.
Simply put, brushing isn’t enough.
Dental appliances and instruments have irregular shapes, tight crevices, and surface tension that make them difficult to clean thoroughly. That’s why more and more professionals—and savvy consumers—are turning to ultrasonic cleaners as part of their standard care routine.
Because when your goal is true hygiene, surface-level cleaning just doesn’t cut it.
UV Ultrasonic Cleaner – 360° Deep Cleaning for Dentures, Jewelry & Household Use, with UV Light & 48kHz Frequency, 3 Modes
How Ultrasonic Cleaning Works (And Why It’s Ideal for Dental Use)
Ultrasonic cleaning might sound futuristic, but the science is well-established. In fact, it’s been used in medical, dental, and industrial settings for decades—quietly working behind the scenes to restore tools, materials, and components to a level of cleanliness that’s hard to match by hand.
So how does it work?
Ultrasonic cleaners use high-frequency sound waves, typically around 40,000 Hz, to generate microscopic bubbles in a liquid solution. These bubbles form and collapse rapidly in a process called cavitation. When they collapse near a surface, they release a burst of energy strong enough to dislodge even the tiniest contaminants.
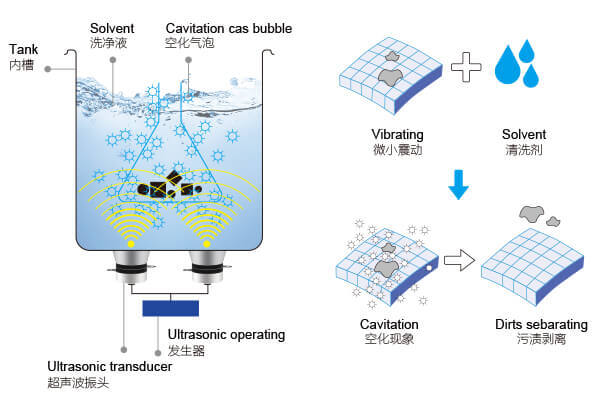
The Principle Behind Ultrasonic Cleaning
This cleaning action is:
- Non-abrasive: No brushes or scrubbing required
- Evenly distributed: Reaches every corner of a tool or appliance
- Highly effective: Removes protein residues, bacteria, and biofilm
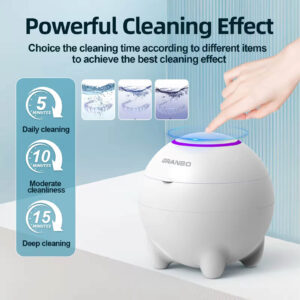
- Fast: Most cycles last between 5 to 15 minutes
For dental tools and appliances, this means thorough cleaning without damaging delicate surfaces. Retainers with grooves, scalers with serrated edges, or implant drivers with internal hexes—all benefit from ultrasonic action. The bubbles penetrate areas that even the smallest bristles can’t reach.
In fact, ultrasonic cleaning has become standard in many dental labs and clinics as a pre-sterilization step, required before items are placed in autoclaves. It’s also widely recommended for home users with removable dental appliances who want a deeper clean than what soap and water can provide.
Ultrasonic cleaners work with a range of solutions designed for dental use, including enzymatic detergents that break down proteins and alkaline formulas that dissolve plaque or polish residues.

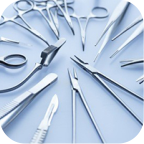
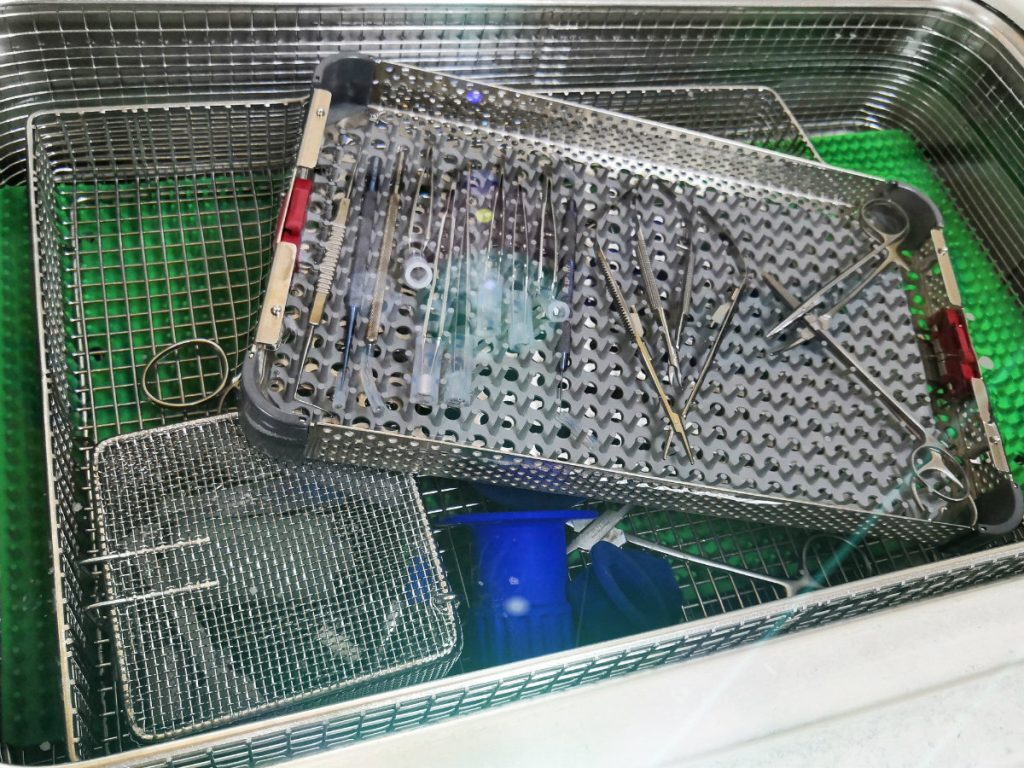
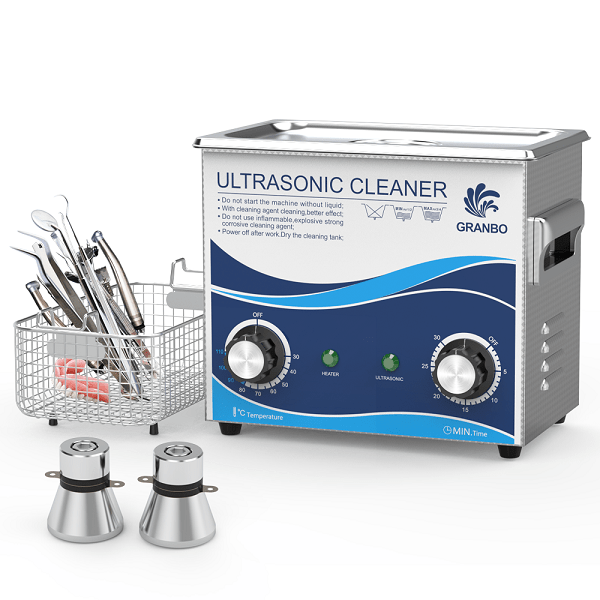
3.2L Dental Instruments Cleaning
When paired with the right solution and used with proper timing, an ultrasonic cleaner doesn’t just clean—it restores.
Now that we understand the “why” and “how,” let’s take a closer look at what kinds of dental items are safe to clean ultrasonically—and how to use the cleaner step by step.
Can You Use an Ultrasonic Cleaner for Dental Tools and Devices?
The short answer is yes—ultrasonic cleaners are widely used in both professional dental settings and at home to clean a variety of dental-related items. But as with any medical-grade or oral appliance, the real answer is more nuanced. Success depends on what you’re cleaning, how it’s used, and what it’s made of.
In clinical environments, ultrasonic cleaners are often the first stage in the instrument reprocessing chain. After a procedure, tools such as scalers, curettes, forceps, mirrors, or implant drivers are soaked in an enzymatic solution and then placed in an ultrasonic bath to remove blood, tissue, and protein residues. This is done before autoclaving or sterilization.
This pre-cleaning step is endorsed by the Centers for Disease Control and Prevention (CDC) and the American Dental Association (ADA) as part of standard infection control protocols. Manual scrubbing with brushes is not only time-consuming but increases the risk of sharps injuries. Ultrasonic cleaning eliminates that risk while providing a more uniform result.
For home users, ultrasonic cleaning is just as valuable—though the goal is usually hygiene, not sterilization. Items like:
- Clear retainers (e.g., Invisalign trays)
- Traditional Hawley retainers
- Night guards and bite splints
- Partial or full dentures
- Toothbrush heads or dental floss holders
…can all benefit from ultrasonic cleaning when done correctly.
One key point: Ultrasonic cleaning is not sterilization. It’s a cleaning method, not a disinfecting or sanitizing one. For dental clinics, ultrasonic cleaning must always be followed by proper sterilization (usually via steam autoclave or dry heat).
But when it comes to removing visible and microscopic contamination—plaque film, tartar buildup, residual paste, or food debris—ultrasonic cleaning is far superior to soaking in water or brushing alone.
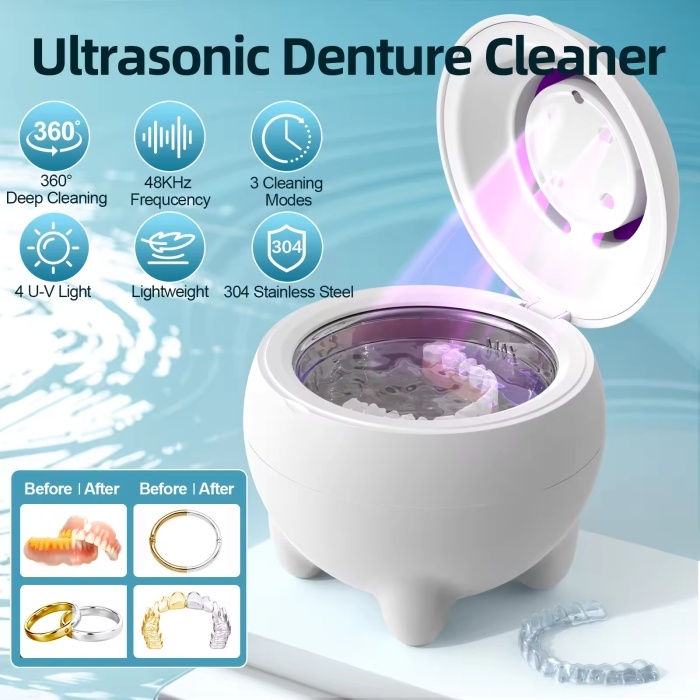
GRANBO GC01 Ultrasonic Denture cleaner
Step-by-Step Guide: How to Use an Ultrasonic Cleaner for Dental Items
Whether you’re a dentist preparing for instrument processing or a patient cleaning your retainer at home, the steps for ultrasonic cleaning are surprisingly straightforward—and when done correctly, extremely effective.
Here’s how to get the most out of your ultrasonic cleaner for dental applications:
1. Choose the Right Cleaning Solution
Start with a dental-specific solution. Enzymatic formulas are great for dissolving protein-based residues on surgical instruments, while alkaline solutions may work better for denture stains and polish remnants. Never use bleach or vinegar—they can damage dental metals and degrade plastic.
2. Fill the Tank with Distilled Water
Pour in distilled water to the fill line of your ultrasonic tank. Distilled water ensures consistent cavitation and avoids mineral buildup on instruments or appliances.
3. Add Cleaning Solution According to Instructions
Mix the cleaning agent into the tank per the manufacturer’s ratio (usually 1:10 or 1:20). Some cleaners come in concentrates; others are ready to use.
4. Place Items in a Mesh Basket or Tray
Never place items directly on the bottom of the tank. Use the provided basket or a stainless steel tray to hold tools, aligners, or dentures. Make sure items are not stacked or overlapping to allow uniform exposure.
5. Set the Temperature and Cycle Time
For most dental items, maintaining a water temperature between 30°C and 40°C (86°F to 104°F) strikes the perfect balance between effective cleaning and material safety. If you’re using multi-enzymatic solutions, it’s especially important not to exceed 45°C—higher temperatures can deactivate the enzymes and compromise the performance of the cleaner, while also risking warping delicate items like thermoformed retainers.
- 5–8 minutes for home dental appliances
- 10–15 minutes for professional tools post-procedure
6. Run the Cleaner and Observe
Start the cycle and watch as microscopic bubbles lift debris from every surface. You’ll often see cloudy water after the first cycle—proof that cleaning is happening.
7. Rinse Items After Cleaning
After the ultrasonic cycle ends, remove the basket and rinse each item under clean water to remove any loosened particles or leftover solution.
8. Dry Thoroughly
Use a lint-free cloth or let items air dry. For instruments in clinical settings, drying is a required step before sterilization.
9. Replace Solution Regularly
Don’t reuse cloudy or contaminated cleaning fluid. Dental clinics typically change solution after each batch; home users should replace fluid every 1–2 uses depending on visible debris.
With just a few minutes and the right setup, you’ll achieve a level of clean that’s simply not possible with handwashing alone.
Granbo Dental Ultrasonic Cleaner
What Dental Items Can Be Safely Cleaned Ultrasonically?
Not every dental item belongs in an ultrasonic bath. But many do—and they benefit tremendously from the microscopic cleaning action that only ultrasonic cavitation can deliver.
Here’s a breakdown of commonly used dental items that are safe for ultrasonic cleaning:
Stainless Steel Instruments
This includes scalers, curettes, explorers, surgical instruments, implant tools, and periodontal instruments. These are designed for repeated sterilization and handle ultrasonic cleaning well.
Orthodontic Appliances
Retainers (both wire-and-acrylic and clear aligners), space maintainers, and some types of fixed appliances can be safely cleaned, provided they don’t contain glued components.
Dentures and Partial Plates
Full and partial dentures—especially those with metal frameworks—respond well to ultrasonic cleaning. It helps remove biofilm, tartar, and stain buildup in tight areas.
Night Guards and Bite Splints
Thermoformed plastic devices used for bruxism or TMJ disorders can be safely cleaned, although care should be taken to use low temperatures to avoid warping.
Lab Items
Impression trays, wax spatulas, mixing tools, and polishing attachments can all be ultrasonically cleaned before sterilization.
Silicone or Acrylic Tools
Items made from hardened dental acrylics or high-grade silicone are generally safe, though they may require lower heat and shorter cycles.
Toothbrush Heads and Floss Picks
For home use, toothbrush heads and reusable floss holders can benefit from ultrasonic cleaning to remove biofilm and calcium deposits.
However, the safety of ultrasonic cleaning is not universal.
What Should Not Go in an Ultrasonic Dental Cleaner
While ultrasonic cleaners are extremely versatile, not every dental item is suitable for ultrasonic cleaning. Using the wrong materials can lead to distortion, discoloration, detachment of components, or even permanent damage to the item or the cleaner itself.
The first category to avoid includes electronic or battery-powered items. This might seem obvious, but many users mistakenly try to clean electric toothbrush handles or powered dental tools. These should never go in the tank. Moisture can seep into sealed areas and cause internal corrosion or short circuits.
Another no-go is items with glued or cemented components. Orthodontic appliances that include adhesive-bonded elements, such as composite patches or bonded brackets, may weaken or detach in an ultrasonic bath. The vibrations from cavitation can loosen cemented joints, even if the damage is not immediately visible.
Delicate plastics and soft resins also require caution. Some thermoformed retainers or mouthguards made with low-melting-point polymers can warp under heat. If these items are placed in a unit with heated water or used for too long, they may lose their shape.
You should also avoid placing any wood-handled or porous-handle tools into an ultrasonic cleaner. These materials can absorb liquid, swell, or degrade. This is especially important in older instruments still used in certain clinics or dental labs.
Other items to keep out include:
- Dental burs with internal mechanisms
- Polishing tools with felt or fabric heads
- Items with loose stones or embedded decorations
- Tools with already compromised coatings
- Any item not explicitly marked as autoclavable or ultrasonic-safe
A good rule to follow is this: if you would hesitate to autoclave it, double-check before using ultrasonic cleaning. When in doubt, refer to the manufacturer’s care guidelines or consult dental equipment references before placing anything in the tank.
Choosing the Right Ultrasonic Cleaning Solution for Dental Applications
A powerful ultrasonic cleaner is only as effective as the solution it uses. Water alone is not enough. In dental applications, the cleaning fluid needs to target very specific types of debris—blood, proteins, plaque film, and polishing paste—without damaging the materials involved.
The most common and effective type of solution is enzymatic detergent. These contain proteases and other biological agents that break down protein-based residues. They are ideal for surgical tools, mirrors, scalers, and forceps, especially in a clinical setting. Enzymatic cleaners are often the first choice for pre-sterilization cleaning.
For dentures or mouthguards, a neutral pH solution may be preferred. These are less aggressive than enzymatic or alkaline cleaners and are safer for plastic and resin-based appliances. Neutral solutions are also better for daily use by home users, especially when cleaning personal dental appliances.
Some advanced applications call for alkaline cleaners, which are effective in breaking down heavy biofilm or paste residues from polishing or adjustment procedures. These are sometimes used in dental labs to clean wax tools or metal frames before casting.
A few more pointers:
- Always dilute concentrate solutions according to instructions. Using too much can reduce cavitation or damage instruments
- Never mix different types of solutions. Chemical reactions can reduce cleaning efficiency or create unwanted residues
- Change the solution daily or after each use depending on contamination level
- Look for formulas labeled as biodegradable and non-corrosive for long-term tank health and safety
Some dental supply companies even offer solutions formulated for ultrasonic use with added rust inhibitors or anti-corrosion agents. These can extend the lifespan of your instruments and reduce maintenance for the cleaner itself.
The right solution will not only clean better, it will protect your investment and ensure a safer experience for the patient.
How Long and How Often Should Dental Items Be Ultrasonically Cleaned
Timing is everything when it comes to ultrasonic cleaning. Clean too little, and you risk leaving behind biofilm or contaminants. Clean too much, and you may wear down sensitive components or materials. Finding the right balance ensures both hygiene and preservation.
For clinical dental instruments, the frequency is determined by use. After every procedure, tools must go through cleaning, rinsing, drying, and sterilization. Ultrasonic cleaning is the preferred step after pre-soaking and before autoclaving. These tools should be cleaned in the ultrasonic bath after every patient use, without exception.
The cleaning duration for these instruments typically ranges from 10 to 15 minutes depending on the debris and the solution used. Heavily soiled items may need a longer cycle or an additional pre-soak, but never exceed 20 minutes unless specified by the solution manufacturer. Excessive time can lead to pitting of metal surfaces.
For home dental appliances, such as clear aligners, night guards, or retainers, ultrasonic cleaning is generally needed once per day for hygiene and odor control. Shorter durations—five to eight minutes—are sufficient for daily maintenance. Weekly deep cleaning cycles with a stronger solution can be added if visible staining or buildup appears.
Dentures, especially partials with metal clasps or full sets with tight grooves, can also benefit from daily ultrasonic cleaning. If food particles or plaque accumulate faster, consider increasing cleaning frequency or adjusting your brushing habits.
When determining frequency, always factor in:
- The material of the item
- How often it is used
- Whether it contacts blood or oral fluids
- Recommendations from your dentist or manufacturer
If you notice discoloration, odor, or a slimy texture on your appliance or tools, that is a sign the current cleaning frequency is not enough.
Remember, ultrasonic cleaning should complement, not replace, manual rinsing or brushing when appropriate. Together, they form a complete hygiene routine for dental care tools.
Dental ultrasonic cleaninhg device
Maintenance Tips for Dental Ultrasonic Cleaners
Like any piece of professional or personal equipment, an ultrasonic cleaner will only perform at its best if it is properly maintained. Dental applications require consistent performance, and that means keeping the machine in top condition day after day.
Start with the cleaning tank. After each use, especially in clinical settings, the tank should be drained and wiped down. Residual solution can dry into a sticky film or lead to bacterial growth. A clean microfiber cloth and mild detergent are usually all that is needed to clean the inside surfaces.
It is also important to avoid scratching or damaging the interior of the tank. Never place tools directly on the bottom. Use only the included basket or a compatible tray. Contact with the transducers can interfere with cavitation and shorten the unit’s life span.
Check the power cord and plug regularly for signs of damage, especially if the unit is being moved frequently. Cracks or loose connections are safety hazards and should be addressed immediately.
Most manufacturers recommend periodic checks of the ultrasonic frequency performance. You can perform a simple foil test by placing a sheet of aluminum foil into the tank with water and running a short cycle. Uniform perforation across the foil indicates healthy cavitation. Uneven or absent patterns suggest maintenance is needed.
Here are a few more essential maintenance habits:
- Replace cleaning solution daily in clinics or after two uses at home
- Run an empty cycle with plain water once a week to flush residue
- Clean the exterior housing with a soft cloth—never spray directly onto the unit
- Store in a dry place when not in use
- Follow the manufacturer’s service schedule if applicable
Some high-end dental ultrasonic cleaners come with digital reminders, self-cleaning cycles, or drain valves to make maintenance easier. If your unit lacks these features, just setting a weekly cleaning routine can extend its lifespan significantly.
Taking care of your cleaner ensures it continues taking care of your tools—and by extension, your patients or your own oral health.
Professional Opinions on Ultrasonic Dental Cleaning
The dental community has long embraced ultrasonic cleaning as an essential step in clinical hygiene, especially for reusable tools and hard-to-clean components. But what do dental professionals and industry researchers say about its effectiveness?
According to the Centers for Disease Control and Prevention, ultrasonic cleaning is not only effective but also preferred over manual scrubbing for its ability to reduce sharps injuries and ensure consistency. Their Guidelines for Infection Control in Dental Health-Care Settings describe ultrasonic cleaners as “efficient and safe for pre-cleaning before sterilization, particularly for instruments with hinges, serrations, or complex surfaces.”
The American Dental Association also supports ultrasonic cleaning in its best practices guides. They note that ultrasonic units “increase workflow efficiency and minimize handling,” both critical in fast-paced clinical environments. The ADA recommends proper training for dental staff and routine monitoring of cleaning efficiency to align with OSHA requirements.
Peer-reviewed studies reinforce these claims. A 2022 study published in the Journal of Dental Research and Review compared ultrasonic cleaning to manual brushing and soaking methods. The results showed that ultrasonic units removed up to 95 percent more plaque biofilm from orthodontic appliances and surgical tools when used with enzymatic cleaners.
In the realm of prosthodontics and orthodontics, clinicians often rely on ultrasonic cleaners to maintain hygiene in removable appliances like clear aligners, which are prone to harboring bacteria if cleaned improperly. Many aligner manufacturers even recommend ultrasonic cleaning in their care instructions.
Dental hygienists, who often clean tools and educate patients, value ultrasonic cleaning for its speed and thoroughness. In interviews conducted by RDH Magazine, several professionals noted that ultrasonic pre-cleaning significantly reduced the wear on instruments compared to brushing, extending the life of expensive stainless steel tools.
For home users, dentists often recommend ultrasonic cleaners for patients with complex dental appliances or poor manual dexterity. Patients who struggle with arthritis, for example, may find ultrasonic units easier and more reliable than daily brushing routines.
In both professional and personal use cases, expert consensus is clear: ultrasonic cleaning is not just effective, it is an evolving standard of care in modern dental hygiene.
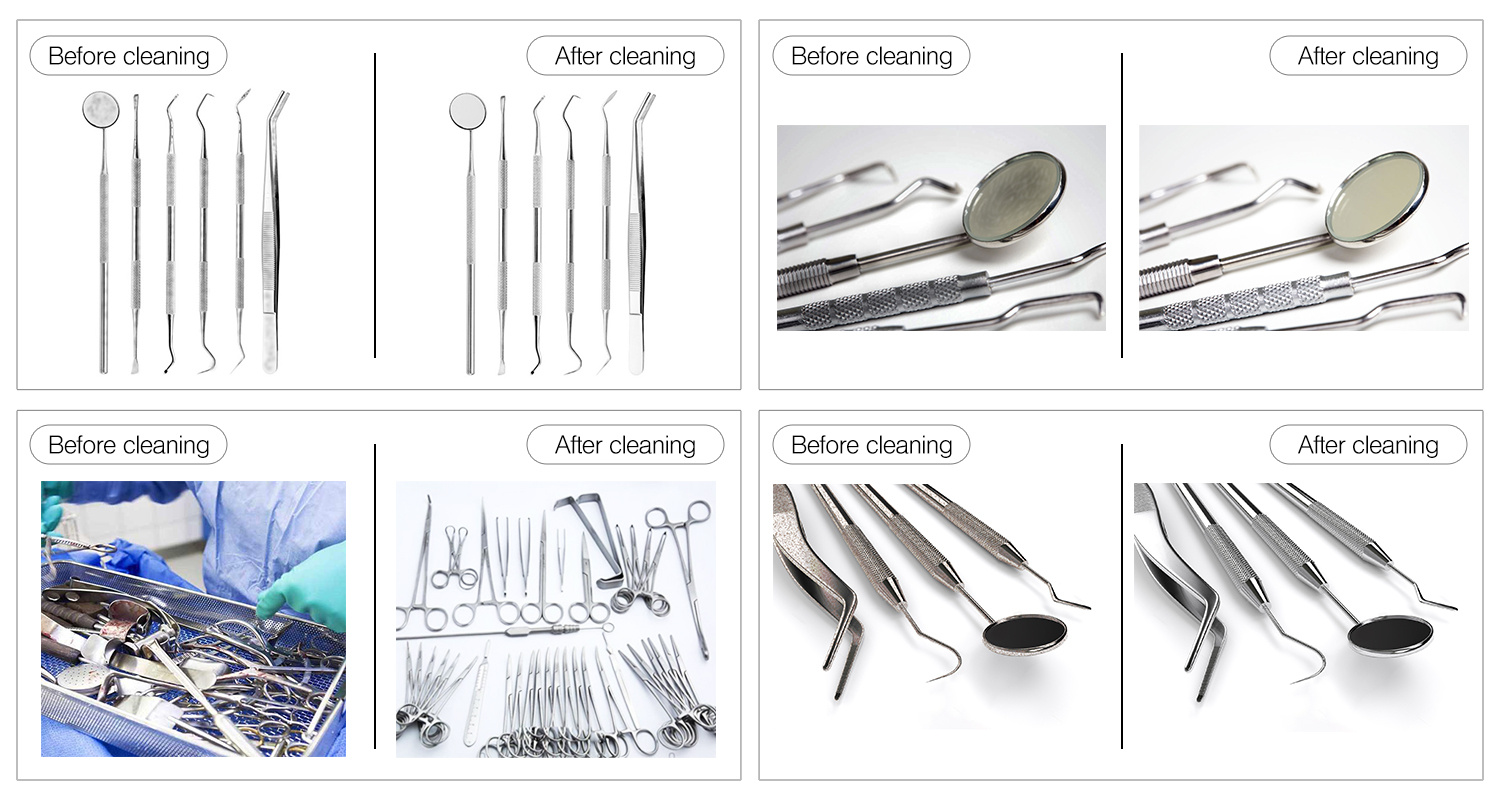
Comparison of Cleaning Results
Real-World Use Cases in Clinics and Homes
The benefits of ultrasonic dental cleaning are not confined to theory. Across real-world applications—both in busy dental practices and in household settings—ultrasonic cleaners are proving their worth every day.
Consider Sunrise Dental Group, a multi-location practice in California. Their lead hygienist reports that ultrasonic cleaning has cut down their instrument prep time by 35 percent, allowing staff to focus more on patient care and less on scrubbing trays. Their sterilization room is equipped with dual-chamber ultrasonic tanks, which they use for alternating instrument loads throughout the day.
They also noted fewer incidents of staff injury from sharp instrument handling since transitioning from hand scrubbing to ultrasonic cleaning for all tools. Not only has the quality of cleaning improved, but overall staff safety and satisfaction have gone up as well.
In orthodontic offices, ultrasonic cleaners are frequently used to maintain tools like band pushers, wire cutters, and bond removing pliers. One practice in New York reported that switching to ultrasonic cleaning extended the lifespan of their pliers by over 18 months, thanks to the reduced friction and pressure compared to manual scrubbing.
For home users, the convenience is even more personal. Maria, a college student in Texas, uses a small tabletop ultrasonic unit to clean her clear aligners every evening. She says it prevents the plastic from yellowing and eliminates the need for scrubbing, which often left scratches. She runs the unit for six minutes with a mild cleaning solution and notes that her retainers always “feel like new” afterward.
Another example comes from a retiree in Florida who uses his ultrasonic cleaner to maintain his full dentures. He pairs it with a low-pH cleaner and uses it once daily. The result has been fresher breath, reduced staining, and fewer instances of gum irritation.
These stories underscore the real-world value of ultrasonic dental cleaning. It is not a luxury or a niche product—it is a practical tool improving hygiene, efficiency, and peace of mind across thousands of clinics and homes.
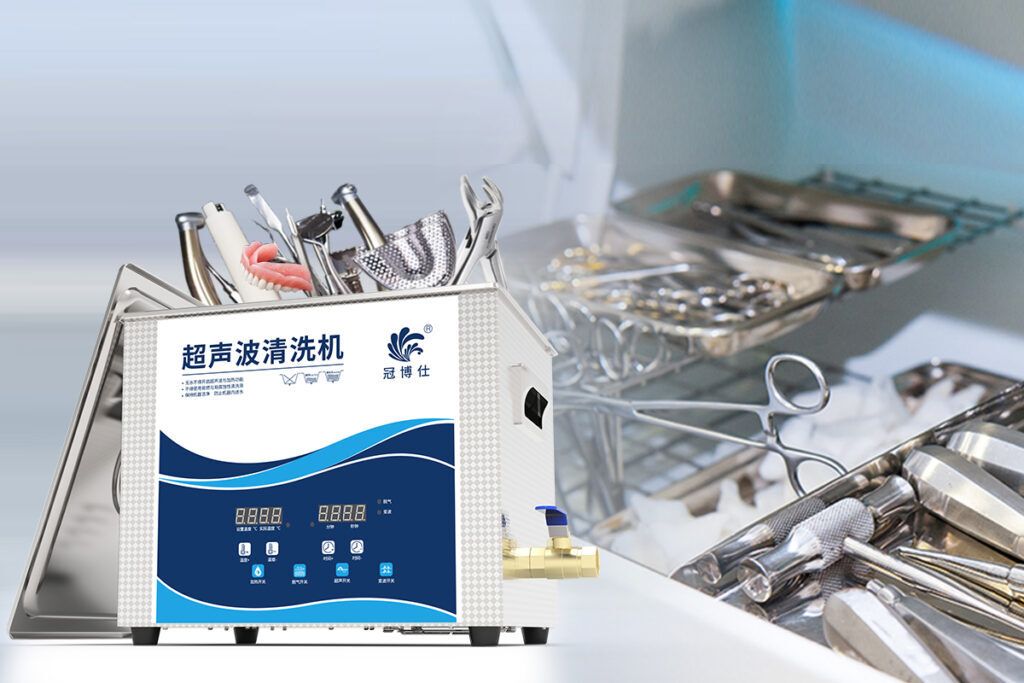
ultrasonic cleaner for dental equipment
Final Thoughts on Integrating Ultrasonic Cleaners into Your Dental Routine
Ultrasonic dental cleaners are not just for clinics and professionals anymore. With the growing availability of compact, affordable, and easy-to-use models, more individuals are bringing this technology into their homes to care for aligners, retainers, dentures, and more.
In professional settings, ultrasonic cleaning has become the gold standard for pre-sterilization hygiene. It simplifies workflows, ensures consistent cleanliness, and significantly reduces the risks associated with manual handling of sharp tools. Whether you’re operating a busy practice or managing a dental lab, the benefits are immediate and measurable—reduced time, increased safety, and improved instrument longevity.
At home, ultrasonic cleaners are empowering users with a reliable method to clean dental appliances thoroughly without the friction, guesswork, or mess of manual scrubbing. For those with oral appliances made of resin, acrylic, or stainless steel, ultrasonic cleaning adds an extra layer of hygiene—especially when paired with dentist-approved solutions and proper timing.
Of course, like any tool, ultrasonic cleaners are most effective when used correctly. That means selecting the right cleaning solution, respecting the recommended cycle time, maintaining your device regularly, and understanding what can and cannot be placed in the tank. Following these guidelines ensures both safety and results.
As we look to the future, expect ultrasonic technology to become even more refined—perhaps integrating features like UV sterilization, smart monitoring, or AI-powered cycle adjustment. For now, its proven ability to reach microscopic crevices and remove stubborn contaminants makes it an indispensable tool in the dental hygiene arsenal.
If you’re considering whether to incorporate ultrasonic cleaning into your dental routine, the science and real-world experience say yes. Whether you’re a dentist, dental hygienist, orthodontist, or just someone trying to keep your retainers fresh, ultrasonic cleaning offers a smarter, safer way to clean.