


Can You Use Washing Up Liquid in an Ultrasonic Cleaner? What You Need to Know
Browse Volume:49 Classify:Support
You’ve just invested in an ultrasonic cleaner, or perhaps you’re considering one, and now you’re wondering about the cleaning solution. The bottle of washing up liquid sitting by your kitchen sink seems like an obvious choice. After all, it cleans dishes effectively, so why wouldn’t it work in your ultrasonic cleaner?
The short answer is that while you technically can use washing up liquid in an ultrasonic cleaner, it’s far from ideal and can actually cause more problems than it solves. Many people make this mistake, thinking they’re being resourceful, only to discover they’ve reduced their cleaner’s effectiveness or even damaged their equipment.
Understanding Ultrasonic Cleaners and How They Work
Before we dive into the washing up liquid debate, it’s crucial to understand what makes ultrasonic cleaners different from ordinary cleaning methods. These devices aren’t just fancy water baths. They operate on a completely different principle that requires specific conditions to work properly.
The Science Behind Ultrasonic Cleaning
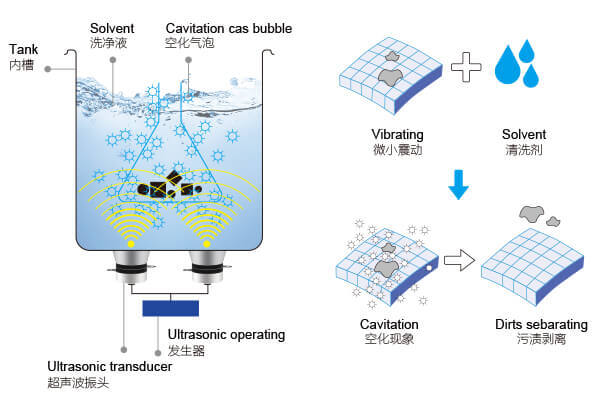
Ultrasonic cleaners generate high-frequency sound waves, typically between 20 and 40 kHz, which create millions of microscopic bubbles in the cleaning solution. This process, called cavitation, is where the real cleaning power comes from. These tiny bubbles form and collapse thousands of times per second, creating shock waves that dislodge dirt, grease, and contaminants from surfaces.
The Principle Behind Ultrasonic Cleaning
The cavitation process is incredibly powerful. Those collapsing bubbles can reach temperatures of thousands of degrees Celsius for a fraction of a second and create jets of liquid that penetrate into crevices no brush or cloth could reach. This is why ultrasonic cleaners can restore jewelry, remove carbon buildup from engine parts, and clean intricate medical instruments so effectively.
However, cavitation requires specific conditions. The cleaning solution must have the right surface tension, viscosity, and chemical properties. Any interference with these characteristics directly impacts cleaning performance.
Why Cleaning Solution Matters
The liquid in your ultrasonic cleaner isn’t just a carrier for chemicals. It’s the medium through which ultrasonic waves travel and where cavitation bubbles form. Think of it like trying to skip stones on different surfaces. You can skip stones across calm water, but try it in thick mud or foam, and you’ll get very different results.
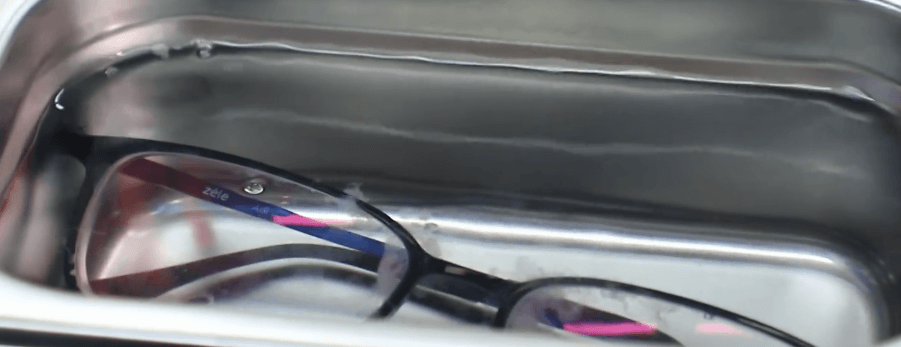
The glasses are undergoing cleaning in the ultrasonic cleaner
Professional ultrasonic cleaning solutions are formulated to maintain optimal conditions for cavitation while providing the chemical action needed to break down specific contaminants. They control foam production, maintain proper pH levels, and include ingredients that enhance the ultrasonic process rather than interfering with it.
The Truth About Washing Up Liquid in Ultrasonic Cleaners
Now let’s address the elephant in the room. What actually happens when you pour washing up liquid into your ultrasonic cleaner? The results might surprise you, and they’re rarely what users expect.
What Happens When You Use Dish Soap
Washing up liquid is specifically designed to create foam. That’s actually one of its selling points for hand washing dishes. Manufacturers add foaming agents because consumers associate bubbles with cleaning power. When you wash dishes by hand, those bubbles help suspend grease and provide visual feedback that the soap is working.
But in an ultrasonic cleaner, foam is your enemy. When the ultrasonic transducers activate, they cause the washing up liquid to foam excessively. This foam creates a barrier between the ultrasonic waves and the items you’re trying to clean. Instead of millions of cavitation bubbles doing precision work on your jewelry or glasses, you get a tank full of soap suds that actually dampens the ultrasonic effect.
I’ve personally witnessed this firsthand when a colleague decided to clean his watch collection using dish soap in his new ultrasonic cleaner. Within seconds of activation, foam erupted from the tank like a science fair volcano. Not only did the watches come out barely cleaner than when they went in, but he spent the next hour cleaning soap residue from his equipment.
The Foam Problem Explained
Excessive foam doesn’t just reduce cleaning effectiveness. It fundamentally changes how the ultrasonic cleaner operates. The foam acts as a cushion, absorbing the energy from the ultrasonic waves before they can create proper cavitation. You’re essentially running your cleaner at a fraction of its potential power.
Moreover, the foam can trigger the cleaner’s safety mechanisms. Many modern ultrasonic cleaners have sensors that detect abnormal operating conditions. Excessive foaming can cause the unit to shut down repeatedly or reduce power output automatically, leaving you frustrated and your items inadequately cleaned.
The chemistry behind this is straightforward. Surfactants in washing up liquid reduce surface tension too much and in the wrong way. While some surface tension reduction can help cleaning, dish soap takes it too far, creating stable foam that persists throughout the cleaning cycle.
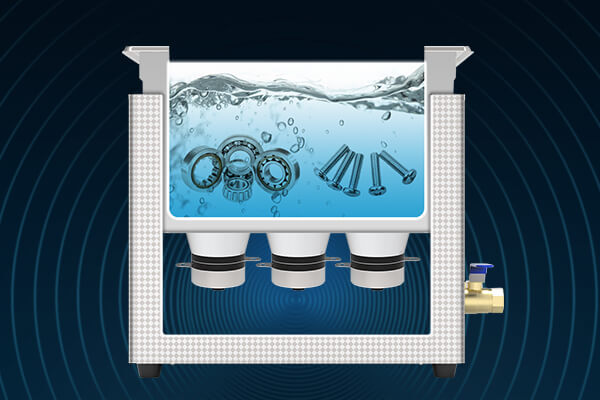
Hardware parts are being cleaned in an ultrasonic cleaning machine.
Why Washing Up Liquid Falls Short
Beyond the immediate foam problem, washing up liquid has several other drawbacks that make it unsuitable for regular ultrasonic cleaning use. These issues might not be immediately obvious, but they can cause long-term problems.
Residue and Film Issues
Washing up liquid contains additives designed for hand washing dishes, including moisturizers for skin protection, fragrances, and stabilizers. These ingredients don’t rinse away completely in an ultrasonic cleaner, especially if you’re not using fresh rinse water afterward.
The result is a thin film that deposits on your cleaned items. On jewelry, this film can make gemstones look cloudy. On eyeglasses, it creates smears that are worse than the original dirt. On electronic components or precision instruments, this residue can interfere with function or cause corrosion over time.
This residue problem is particularly troublesome because it’s cumulative. Each cleaning cycle adds another microscopic layer, and what starts as barely noticeable can become a significant problem after multiple cleanings. I’ve seen antique coins lose their luster and collectible watches develop hazy crystal covers, all from repeated washing up liquid use.
Potential Damage to Your Cleaner
Your ultrasonic cleaner is a precision instrument with delicate components. The transducers that generate ultrasonic waves are bonded to the tank with special adhesives. The wrong cleaning solution can degrade these bonds over time, potentially leading to costly repairs or replacement.
Washing up liquid, particularly concentrated formulas, can be harsh on the seals, gaskets, and plastic components in your cleaner. While one or two uses probably won’t cause catastrophic failure, regular use accelerates wear and can void your warranty. Most manufacturers explicitly state that only approved solutions should be used.
There’s also the issue of corrosion. Dish soap formulas often contain ingredients that, while safe for dishes, can promote corrosion on the stainless steel or aluminum components inside ultrasonic cleaners, especially if solution is left sitting in the tank between uses.
What You Should Use Instead
If washing up liquid isn’t the answer, what should you use? Fortunately, there are excellent alternatives available, ranging from specialized commercial products to simple DIY solutions that work far better than dish soap.
Purpose-Made Ultrasonic Cleaning Solutions
Ultrasonic Cleaning Solution
Commercial ultrasonic cleaning solutions are formulated specifically for cavitation-based cleaning. They come in various types designed for different applications, whether you’re cleaning jewelry, automotive parts, electronics, or medical instruments.
Jewelry cleaning solutions typically contain mild alkaline cleaners with anti-tarnish agents. They’re pH-balanced to be safe for precious metals and most gemstones while effectively removing oils, lotions, and everyday grime. These solutions produce minimal foam and enhance rather than inhibit cavitation.
Industrial degreasers for ultrasonic cleaners are more aggressive, designed to remove heavy oils, grease, and carbon deposits from mechanical parts. They often contain surfactants specifically chosen to work with ultrasonic action without excessive foaming.
Enzymatic cleaners break down organic contaminants using biological enzymes. They’re excellent for medical and dental instruments, tattoo equipment, and other items contaminated with biological material.
The key advantage of purpose-made solutions is that they’re tested and optimized for ultrasonic cleaning. Manufacturers invest significant research into ensuring their products enhance cavitation, control foaming, rinse clean, and protect both your items and your equipment.
DIY Alternatives That Actually Work
If you prefer to make your own cleaning solution or need something in a pinch, there are simple recipes that work surprisingly well. These are based on ingredients that don’t create excessive foam and support good cavitation.
Simple water and ammonia solution works well for general cleaning. Mix one tablespoon of household ammonia per liter of water. Ammonia is an excellent degreaser, doesn’t foam, and rinses cleanly. However, only use this for items that can tolerate ammonia, never for pearls, opals, or certain other gemstones.
Distilled water alone is sometimes all you need, particularly for items that just need dust and light soil removal. The ultrasonic action itself is often sufficient without any additives. Distilled water prevents mineral deposits on your items and in your cleaner.
Water with a small amount of citric acid creates a mildly acidic solution excellent for removing mineral deposits and tarnish. Use about one teaspoon of citric acid powder per liter of water. This works beautifully for cleaning copper, brass, and removing hard water stains.
The crucial principle with DIY solutions is less is more. You want just enough chemical action to help the ultrasonic cavitation, not so much that you create foam or leave residue.
When Washing Up Liquid Might Be Acceptable
Despite everything I’ve said, there are rare situations where using washing up liquid in an ultrasonic cleaner might be your only option. If you understand the limitations and take proper precautions, you can minimize the problems.
Emergency Situations and Temporary Solutions
Imagine you’re traveling and need to clean your hearing aids or retainer urgently, but you don’t have access to proper ultrasonic cleaning solution. Or perhaps your specialized cleaner has run out, the store is closed, and you absolutely need to clean something before an important event.
In these emergency scenarios, washing up liquid can serve as a temporary substitute, provided you’re aware of the tradeoffs. You’ll sacrifice cleaning effectiveness and risk some residue, but it’s better than not cleaning at all if the situation is urgent.
How to Use It Safely If You Must
If you absolutely must use washing up liquid, follow these guidelines to minimize problems. First, extreme dilution is critical. Use only two or three drops per liter of water, far less than you’d use for hand washing dishes. The goal is just enough to provide some surfactant action without creating problematic foam.
Second, choose the simplest formula available. Avoid antibacterial versions, those with added moisturizers, or anything labeled as concentrated. Plain, basic washing up liquid with no fancy additives is your best bet. Clear formulas are generally simpler than colored or pearlescent ones.
Third, run a test cycle first without your items. Fill the tank with your diluted solution and run the cleaner empty for 30 seconds. If you see excessive foam building up, drain it and dilute even further. You might need to go as far as one drop per two liters of water.
Fourth, never let items sit in the solution after the cleaning cycle completes. Remove them immediately and rinse thoroughly under running water. Then rinse again in distilled water if possible to remove any remaining soap film.
Finally, clean your ultrasonic tank thoroughly after using washing up liquid. Run it with clean water only for a full cycle, drain completely, and wipe down the interior. This prevents soap buildup in your equipment.
Best Practices for Ultrasonic Cleaning Success
Regardless of what cleaning solution you choose, following best practices ensures optimal results and protects your investment in both your ultrasonic cleaner and the items you’re cleaning.
Choosing the Right Solution for Different Items
Different materials and contaminants require different approaches. Soft metals like gold and silver respond well to mild alkaline jewelry cleaners. Hard metals like stainless steel can tolerate stronger alkaline solutions. Delicate items like pearls or opals require neutral pH solutions or plain water only.
Heavily soiled items benefit from degreasing solutions, while items with organic contamination clean best with enzymatic formulas. Electronic circuit boards require specialized electronics cleaners that evaporate completely without residue.
Always research the specific needs of your items. What works perfectly for one material might damage another. When in doubt, start with the mildest solution and increase strength only if needed.
Common Mistakes to Avoid
Beyond using washing up liquid, several other mistakes can compromise your ultrasonic cleaning results. Overcrowding the tank prevents ultrasonic waves from reaching all surfaces. Items should be suspended in baskets without touching each other or the tank walls.
Using tap water with high mineral content leaves deposits on your items and inside your cleaner. Distilled or deionized water is worth the small extra cost. Running the cleaner too long can sometimes redeposit loosened dirt. Most cleaning cycles should be between three and ten minutes.
Wrong temperature settings also matter. Some solutions work best at specific temperatures. Too hot can damage delicate items or cause some solutions to degrade. Too cold reduces cleaning effectiveness.
Neglecting regular tank cleaning allows buildup of contaminants and depleted solution. Change your cleaning solution regularly, and deep clean your tank weekly if you use it frequently.
Using abrasive solutions on soft materials is another common error. Even proper ultrasonic cleaning solutions come in different strengths. Match your solution chemistry to your items’ materials.
The investment in an ultrasonic cleaner pays off when you use it correctly with appropriate solutions. While washing up liquid might seem like a convenient shortcut, it undermines the very technology that makes ultrasonic cleaning so effective. Purpose-made solutions or simple DIY alternatives deliver far superior results while protecting your equipment and your valuables. The few extra dollars spent on proper cleaning solution save you from disappointing results, potential damage, and the hassle of dealing with foam and residue.

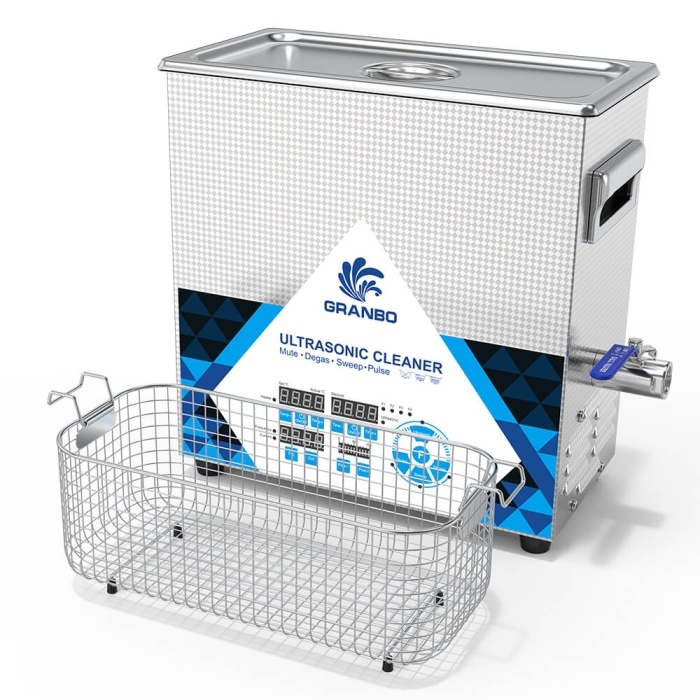
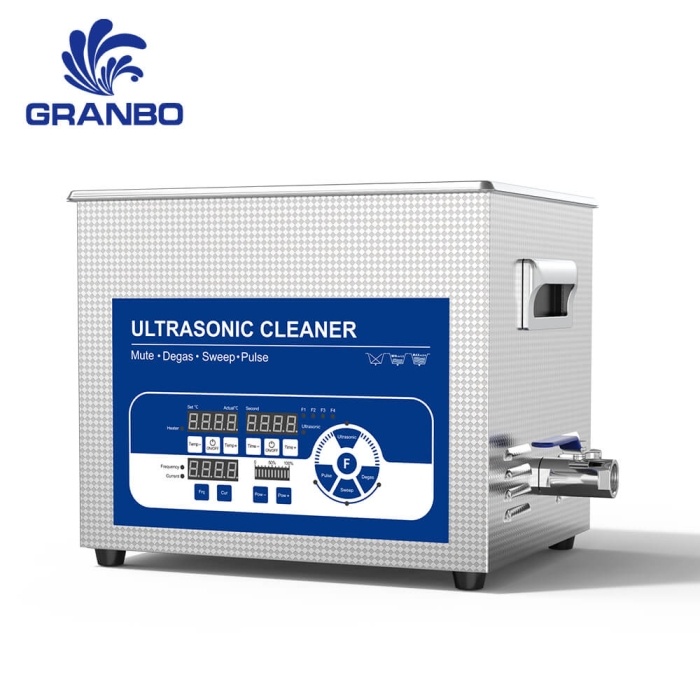
Click to View: Granbo GL Series Ultrasonic Cleaner Family Portrait