


Using Ultrasonic Cleaners for Jewellery Care
Browse Volume:98 Classify:Support
Jewellery doesn’t just sit still and sparkle. It moves with you—through crowded commutes, dinner parties, workouts, and weekend chores. In the process, it collects a surprising amount of residue: natural skin oils, hand creams, perfume particles, soap scum, and even airborne dust settle into tiny crevices.
Over time, these invisible layers dull even the most brilliant gems. Gold begins to lose its warm luster. Diamonds appear foggy. Silver takes on a flat, grey tone. And intricate metalwork—such as filigree or pavé settings—can trap grime that’s almost impossible to reach with a cloth.
Many jewellery owners assume a quick wipe with a soft cloth or an old toothbrush dipped in soap will do the trick. While that may work for basic surface cleaning, it often leaves buildup in hidden areas untouched. This not only affects appearance but can also increase wear-and-tear on prongs and mounts over time.
That’s why a deeper cleaning method is often required—especially for frequently worn rings, chains, or earrings. And this is where ultrasonic technology shines.
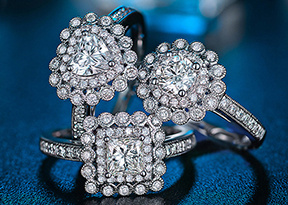
jewelry clean
What Is an Ultrasonic Jewellery Cleaner
An ultrasonic jewellery cleaner is a compact machine that uses high-frequency sound waves to clean items placed in a tank filled with cleaning solution. Unlike scrubbing or soaking, ultrasonic cleaning works through a process called cavitation—the formation and rapid collapse of microscopic bubbles in the liquid.
When the cleaner is turned on, transducers generate ultrasonic waves (usually 20kHz to 200kHz), which cause these bubbles to form and burst around the jewellery’s surface. As they implode, they produce tiny but powerful shockwaves that dislodge dirt, oils, and residues—even from microscopic crevices.
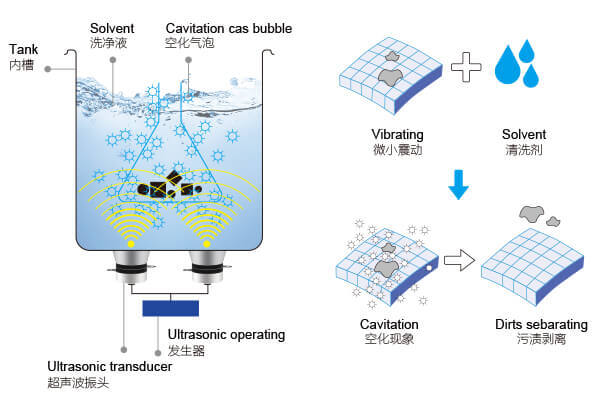
The Principle Behind Ultrasonic Cleaning
It’s a non-contact, highly efficient process that can clean a ring, necklace, or earring in just a few minutes. And unlike traditional methods, it reaches places no cloth or brush can. That’s why ultrasonic cleaners are widely used not just at home, but in professional jewellery shops, watchmaker studios, dental labs, and electronics repair benches.
But while the science is sound, success depends on proper usage. Choosing the right cleaner, using the right solution, and understanding which items are safe to clean are key to avoiding accidental damage.
Is Ultrasonic Cleaning Safe for All Jewellery
Ultrasonic cleaning is powerful—but not universally safe. Whether or not your jewellery is a good candidate depends on the materials, the settings, and any treatments the gemstones may have undergone.
Generally safe:
- Solid gold, platinum, and sterling silver
- Diamonds, sapphires, and rubies
- Hard, untreated gemstones (such as spinel or zircon)
Use with caution or avoid:
- Porous gems like opals, pearls, turquoise, and amber
- Treated gemstones (e.g. fracture-filled diamonds, oiled emeralds)
- Jewellery with glued components or loose prongs
- Antique or vintage jewellery with delicate metalwork
Emeralds, in particular, are a definite no-go unless you’re certain they are untreated—most are clarity-enhanced with oil or resin, which ultrasonic waves can displace.
It’s also crucial to check the integrity of your piece before cleaning. If a stone is loose, a prong is bent, or the mount is weakened from wear, the vibrations of ultrasonic cleaning can worsen the problem—or knock the stone loose entirely.
When in doubt, consult a jeweller or opt for gentle manual cleaning.

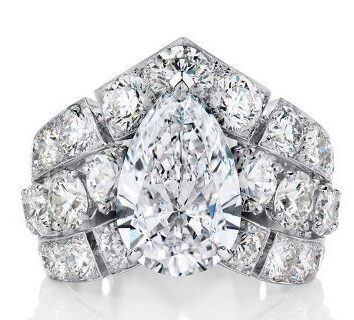
jewelry cleaner
When and Why to Use Ultrasonic Cleaning
For the right jewellery, ultrasonic cleaning offers a level of deep cleaning that’s hard to match.
Rings that are worn daily—especially engagement or wedding rings—collect layers of invisible debris that build up behind the stone and around the setting. These areas can be difficult to clean with brushes or cloths without risking abrasion. Ultrasonic cleaning reaches them effortlessly.
Necklaces with tightly linked chains, earrings with embedded gems, and bracelets with decorative etching also benefit from ultrasonic precision. The technology doesn’t just make jewellery shine—it restores its sparkle to showroom levels.
As for how often to clean:
- For daily wear items, once a month is usually sufficient
- For special occasion jewellery, every few months or before an event
- For pieces exposed to lotions, sunscreen, or heavy sweat, more frequent cleaning may be needed
Ultrasonic cleaning is also a great pre-inspection step before professional appraisals, repairs, or photography. Clean pieces reveal flaws more clearly and allow jewellers to assess settings and gemstones without obstruction.
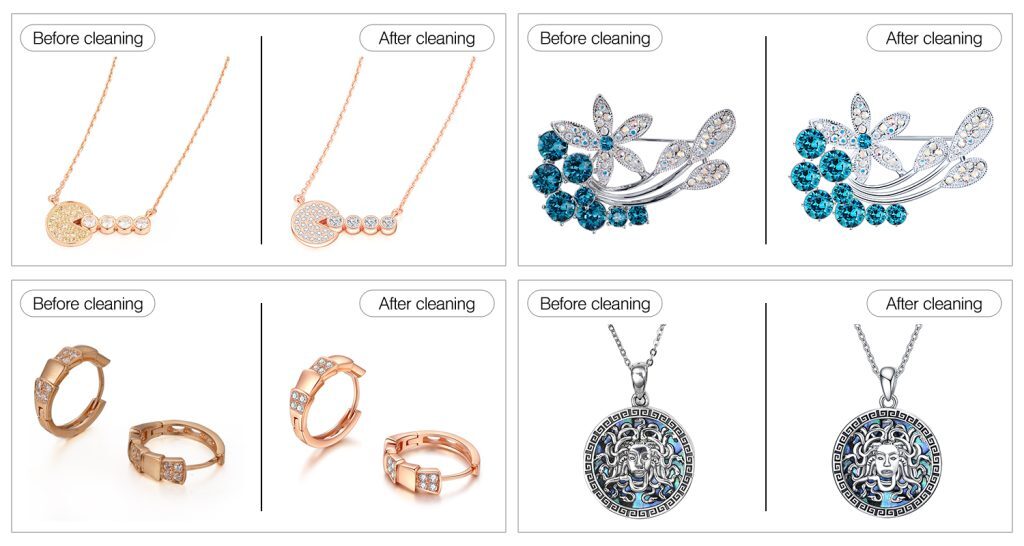
granbo ultrasonic Jewelry Cleaning effect
How to Prepare Your Jewellery for Ultrasonic Cleaning
Before dropping anything into an ultrasonic cleaner, it’s important to take a moment for inspection. Jewellery isn’t just about the materials—it’s about how everything is held together. A loose prong or micro-crack in a stone can turn a quick clean into a costly repair.
Start by looking at each piece under good lighting. Check for:
- Loose or rattling stones
- Worn or bent prongs
- Discolouration or odd reflections in gemstones (a sign of treatments or internal fractures)
- Glue-mounted components, which are common in fashion jewellery
If the piece has pearls, opals, emeralds, or anything with glue (like some enamel accents), it’s best to clean it by hand instead. For other pieces, especially plain metal or hard-stone jewellery in secure settings, ultrasonic cleaning is usually safe.
Also, avoid mixing items that could scratch each other. Diamonds are harder than most stones and can easily leave marks on softer gems or metals if they bump during the cycle. If cleaning multiple items, space them out properly in the basket.
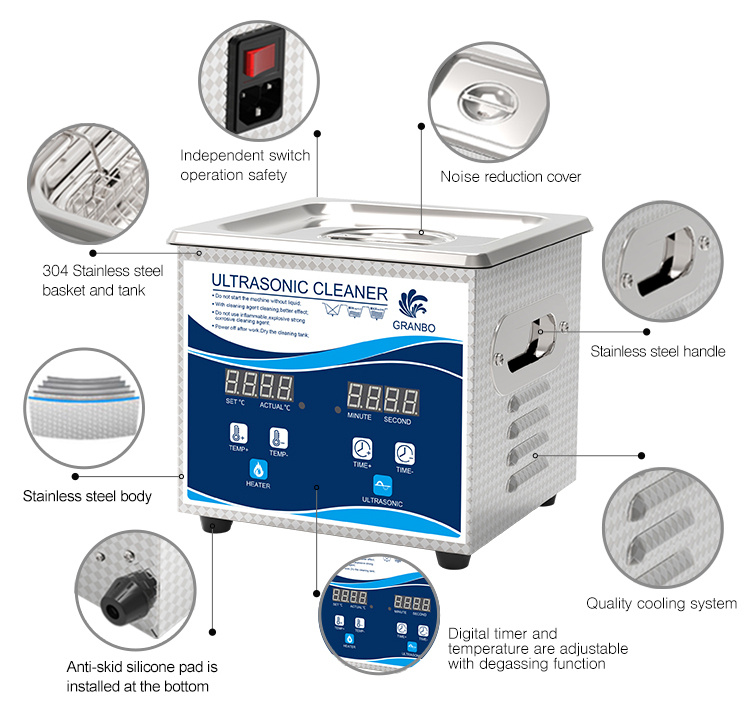
Jewelry Ultrasonic Cleaner
Choosing the Right Ultrasonic Cleaner for Jewellery
Not all ultrasonic cleaners are created equal. If you’re buying one specifically for jewellery, here’s what to look for:
Frequency
Look for a machine that operates around 40 kHz. This frequency strikes the best balance: high enough for gentle cleaning, but strong enough to remove grime. Lower frequencies (25–30 kHz) create larger, more aggressive bubbles—great for industrial tools, not ideal for delicate jewellery.
Tank Size
For rings and earrings, a 500–750 ml tank is enough. If you plan to clean bracelets or multiple pieces at once, consider a 1–2 litre tank. Ensure the tank is stainless steel, as it resists corrosion and distributes ultrasonic energy evenly.
Features to Prioritize
- Digital timer: Allows precise control over cleaning cycles
- Heater: Improves cleaning effectiveness, especially for oily residues
- Degas mode: Removes dissolved gases from the solution before cleaning
- Removable basket: Prevents jewellery from touching the vibrating tank bottom
You don’t need to break the bank. Many consumer-grade units offer these features at reasonable prices. But if you’re running a jewellery business or cleaning valuable items regularly, investing in a professional-grade cleaner can be worthwhile for consistency and safety.
Step-by-Step Instructions: How to Use an Ultrasonic Jewellery Cleaner
Using an ultrasonic cleaner is fairly straightforward, but doing it correctly is key to safe and effective results.
Step 1: Fill the tank
Use distilled water if possible, especially if you live in a hard water area. Tap water can leave mineral deposits. Add a jewellery-specific cleaning solution according to the manufacturer’s instructions. Never use bleach or ammonia.
Step 2: Preheat (if applicable)
If your machine has a heater, turn it on and let the solution warm up to about 30–40°C (86–104°F). Warm solutions improve cavitation and break down oils more effectively.
Step 3: Place your jewellery in the basket
Never place items directly on the tank bottom, as this can damage both the jewellery and the transducers. Use the provided basket, and make sure pieces aren’t touching each other.
Step 4: Set the timer
For most jewellery, 3–5 minutes is enough. You can repeat the cycle if needed, but don’t overdo it. Extended cleaning time can cause wear on settings.
Step 5: Run the cycle
Turn on the ultrasonic function and let the cleaner do its work. You’ll likely see grime lift off within seconds—especially from the backs of rings and earrings.
Step 6: Remove and inspect
Use plastic tweezers or your hands (if the water has cooled). Carefully inspect your jewellery under light to ensure nothing has loosened or cracked.
What Cleaning Solutions Work Best in Ultrasonic Cleaners
While water alone can be used in a pinch, it won’t deliver the same results as a proper cleaning fluid. The solution affects not only the cleaning quality but also the safety of the process.
Avoid:
- Household detergents
- Ammonia
- Acetone
- Vinegar
- Anything acidic or abrasive
Use instead:
- Jewellery-safe ultrasonic cleaning solutions, available from most jewellery or lab supply brands
- Mild, non-ionic surfactants that are pH-neutral and free from dyes or perfumes
- Concentrated professional solutions diluted properly per instructions
Always read the solution’s label for gemstone compatibility. Some are safe for diamonds and gold but not for silver or soft stones. When in doubt, use a universal jewellery cleaning fluid marked safe for ultrasonic use.
Post-Cleaning Care and Inspection
Once the cleaning cycle is complete, there are still a few important steps to ensure the longevity and safety of your jewellery.
Rinse immediately
Use a separate bowl of clean distilled water to rinse off the cleaning solution. Don’t rinse under a running tap—if a stone has loosened, it could fall into the drain without you noticing.
Dry carefully
Use a lint-free cloth (microfibre works best) to pat the jewellery dry. Avoid paper towels, which can scratch softer metals. Let the jewellery air dry completely before storing.
Inspect closely
Look for:
- Shifts in gemstones
- Missing prongs
- Unusual cloudiness or surface changes
If you notice anything, take the piece to a jeweller before wearing it again.
Store properly
Don’t just toss your freshly cleaned items back into a box. Store them in individual pouches or padded compartments to keep them safe from scratching and tangling.
Mistakes to Avoid When Using an Ultrasonic Cleaner
Ultrasonic cleaning seems effortless, but small missteps can lead to major issues. To keep your jewellery safe and your cleaner working properly, here are the most common mistakes to avoid:
Running the tank dry
Never turn on your ultrasonic cleaner without liquid in the tank. Doing so can burn out the transducers, which are the heart of the machine. Always make sure the tank is filled with water or solution before use.
Placing items directly on the tank bottom
This can lead to scratches, dents, or even cracks in the jewellery and can reduce the ultrasonic wave’s effectiveness. Always use the included basket or mesh tray.
Overheating the solution
Too much heat can damage certain gems or adhesives used in some settings. Keep temperatures in the 30–40°C (86–104°F) range unless you’re sure your jewellery can handle more.
Cleaning incompatible stones
As mentioned earlier, avoid cleaning pearls, emeralds, opals, amber, turquoise, and any treated or glued jewellery. These materials can be permanently damaged by ultrasonic vibration or heat.
Cleaning too often
More isn’t always better. Overuse can loosen prongs or wear down delicate engravings. Most jewellery only needs ultrasonic cleaning once a month or less, depending on wear.
Common Questions and Misconceptions
“Can ultrasonic cleaning damage diamonds?”
In most cases, no. Diamonds are incredibly hard and generally safe to clean ultrasonically—if they are untreated and securely set. However, fracture-filled diamonds can lose their clarity enhancements, so it’s important to know if your diamond has been treated.
“Why is my jewellery still dull after ultrasonic cleaning?”
Several possible reasons:
- The solution wasn’t strong enough
- Water hardness left a film
- The jewellery wasn’t rinsed or dried properly
- The item has permanent tarnish or surface damage that needs polishing
“Can I clean multiple items at once?”
Yes, but space them out. Don’t overcrowd the tank, and make sure items aren’t touching, especially if mixing metals or including harder stones like diamonds that can scratch others.
“Is ultrasonic cleaning the same as polishing?”
Not at all. Ultrasonic cleaning removes dirt and oils but does not restore surface shine if a piece is scratched or oxidized. Polishing is a mechanical process done with compounds and tools—not sound waves.
Comparing Ultrasonic Cleaning to Other Methods
When ultrasonic cleaning is not appropriate—or simply not available—there are a few other ways to clean jewellery. Each has its pros and cons.
Manual Cleaning
The safest and most accessible method. Use warm water, mild dish soap, and a soft toothbrush. Ideal for fragile items, vintage jewellery, and gems like emeralds or pearls. Downside: time-consuming and less effective for deep crevices.
Steam Cleaning
Uses high-pressure steam to blast away grime. Very effective, but can be too intense for certain stones. Typically found in jewellery workshops, not homes.
Ionic Cleaners
Use low electrical currents to lift tarnish from precious metals like silver. Gentle and safe for many gems but not as thorough for dirt removal.
Jewellery Wipes and Pens
Good for quick touch-ups. Safe for most materials but limited in scope. Not a replacement for deep cleaning.
Ultrasonic cleaners fill the gap between manual cleaning and professional services, offering thorough results at home—when used responsibly.
Long-Term Jewellery Care Tips
Ultrasonic cleaning is just one part of a broader care routine. Here’s how to keep your pieces looking their best between cleanings:
Store smart
Use individual pouches or soft-lined compartments. Avoid letting chains tangle or harder gems rub against softer ones.
Remove before risky activities
Take off rings before cooking, gardening, or exercising. Sweat, dirt, and impacts can wear down both metal and stones.
Avoid chemicals
Perfumes, hairspray, lotion, and even household cleaners can tarnish metals and cloud stones. Put jewellery on after makeup and products are applied.
Check settings periodically
Even with the best cleaning tools, a loose stone can become a disaster. Inspect your jewellery or have it checked by a professional once or twice a year.
Know your gems
Understand what each piece is made of and whether it’s been treated. This knowledge helps you choose the right cleaning method and avoid costly mistakes.
Professional Opinions and Industry Guidelines
Major gemological institutions have published clear recommendations on ultrasonic jewellery cleaning:
- GIA (Gemological Institute of America) recommends ultrasonic cleaning for most untreated diamonds, sapphires, and rubies, but warns against it for porous or treated stones.
https://www.gia.edu - American Gem Society (AGS) advises consumers to have jewellery inspected before using ultrasonic methods—especially for items with age or wear.
https://www.americangemsociety.org - International Gem Society (IGS) provides detailed gemstone-specific care charts, emphasizing that treatment status is critical.
https://www.gemsociety.org
Jewelers themselves often use ultrasonic cleaners in combination with steam or polishing tools. But even they inspect every item before deciding if it’s safe to immerse.
Their advice to consumers is consistent: know what you’re cleaning, and when in doubt, clean by hand or consult a professional.
Final Thoughts
Ultrasonic jewellery cleaners can make your favourite pieces sparkle like new again—but only if used with care. They offer deep, non-abrasive cleaning for many types of jewellery, especially modern pieces made from durable materials like gold, platinum, diamonds, and untreated sapphires.
But not every item belongs in an ultrasonic bath. Gemstone treatments, fragile settings, and delicate vintage work all require a gentler approach.
When you understand your jewellery and match it with the right cleaning method, ultrasonic cleaning becomes a safe, effective part of your long-term care strategy.
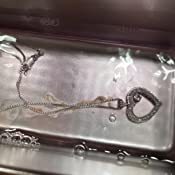
granbo ultrasonic Jewelry Cleaning